So, being that I reside in Canada where all dairy products and most Mexican food products seem inordinately priced (I am seriously convinced there is some kind of dairy mafia in this country), I like to make my enchilada sauce from scratch to save money. I happened to still miraculously have a large quantity of my green lentil/wild rice burrito filling leftover in the freezer from the last crockpot full, so turning it into enchiladas was the perfect dinner solution!
I make no claims to the authenticity of this sauce, only that I love making it, even though it turns out a bit different every time. Don't even think of making it without chipotles!
Enchilada Sauce
1 8 oz can tomato paste
1 22 oz can diced tomatoes
1/2 c. - 1 c. veggie or chicken broth
1 large onion diced
4-6 cloves garlic, crushed
2-4 bay leaves
2 Tbs ground cumin (freshly ground is even better!)
1- 2 tsp? taco seasoning/or mexican chili powder
1-2 tsp mexican oregano
1 small can chipotle peppers
2-3 dried guajillo, ancho, or pasilla peppers (deseeded & destemed)
salt to taste
Saute the onion and garlic in veggie or canola oil until golden brown and tender. Add in the cumin and chili powder or taco seasoning near the end and briefly saute. Pour in the diced tomatoes and tomato paste, along with 1/2 c. broth to start. Add the bay leaves, oregano (you can use italian if you can't find mexican), 1 chipotle pepper and a bit of sauce from the can (NOT THE WHOLE CAN!), and the dried pepper (I think I used ancho) to the tomato mixture. Let simmer for 20-30 min. If needed add in more stock. When finished, puree with a hand blender or in a food blender. Can add more stock or tomatoes if needed. Salt to taste. (Confession: I have also been known to use up small quantities of salsa and even spaghetti sauce in making my enchilada sauce.)
To actually make enchiladas...
Spread 1/4-1/2 c. sauce in the bottom of a 9x13" pan. It should just coat the bottom in a thin layer. Roll up flour tortillas with filling and place edge side down in the pan. Once the pan is full, pour enchilada sauce over the top so all edges of the pan are filled with sauce and there is a nice layer on top. Top with grated cheese (and sliced black olives if you like). Pop in the oven at 325oF for 15-20 min with foil on top. Remove the foil for the last 10-15 min. The sauce should be bubbling a bit, and cheese should be melted. Serve with sour cream or yogurt.
Photos to come...
Thursday, April 28, 2011
Wednesday, April 27, 2011
Homemade Doughnuts!
So I did attempt to make these doughnuts in time for the Saturday brunch, but due to lack of planning they were not in fact ready until after the brunch was already over. Sad for me since a) I did not get the joy of feeding homemade doughnuts to my friends and b) these doughnuts are living in my fridge, taking up space, forcing me to eat them on a daily basis! Curses!
 I used this recipe from 101cookbooks. The great thing about these doughnuts is they really can sit in the fridge (well-wrapped) for at least 3-5 days! You can take out as many as you want to eat that evening or morning, let them rise, and either bake or fry them. I am also experimenting with freezing part of them and rethawing. More news to come on that. Update: it works great!
While these are "doughnuts", be warned that they are not a glorious cakey variety, but more like a bread. I would venture to add a bit more nutmeg to the dough and substitute some honey for the sugar next time.Also, they can puff up quite a lot and end up becoming a doughnut bun (e.g. holeless) so make sure to watch them when they are rising. The doughnut holes themselves are not very good baked and dipped - the cinnamon sugar to dough ratio is too high, so I recommend re-rolling all the holes together and cutting out more doughnuts. I estimate in this manner, one would produce 24-30 doughnuts. I ended up using a clean aluminum can from some chickpeas to make the outer doughnut ring and a shot glass to make the doughnut hole.
If you bake them, I recommend dipping in salted butter, as well as adding sea salt to the cinnamon/sugar mixture. Otherwise it was too much sweet on not enough dough. Another delicious result was obtained by dipping them in melted bittersweet chocolate and then rolling them in the cinnamon sugar/mixture. Or a chocolate dunk on both sides, followed by dunking in chopped pistachios.

To fry them, use about 1/4" inch canola oil in a cast iron pan on medium high heat. Fry to golden brown on both sides. Let cool briefly and then dip in desired toppings.
Sunday, April 24, 2011
Holy Saturday brunch
The cooking continues this weekend ... a lovely afternoon brunch where I was finally able to test my ability to recreate the amazing bread pudding muffin I experienced at Little Nest. I started off using the base recipe from the Grand Central Bakery cookbook, and added the additional flavors I wanted. My only complaint about my muffin, although delicious, was that I didn't quite get the crusty exterior I was going for. Perhaps baking longer at the recommended heat, or letting the bread soak for less time (or having bigger bread chunks of more stale bread).
I also made a version of the quintessential breakfast egg casserole. The best thing about both of these recipes is they can be ASSEMBLED THE NIGHT BEFORE!!! And just hang out in the fridge until morning time or brunch time when you are ready to bake them!

Orange Blossom-Pistachio-Chocolate Bread Pudding Muffins
(makes 16 muffins)
1 lb crusty artisan french bread
1/2 tsp cinnamon
6 eggs
1 1/2 c. whipping cream
1 1/2 c. milk
2/3 c. sugar
2 tsp orange blossom water
1.5 -2 oz roughly chopped semi-sweet chocolate (I used Bakers)
1/4 - 1/3 cup chopped unsalted pistachios
1/4-1/2 tsp salt* (the original recipe did not call for salt, nor did I add it, but I think it would be a good addition!)
1. Cut or tear bread into 1" chunks. Toss with cinnamon in a large bowl.
2. Beat eggs, sugar, cream, milk, and orange blossom water together. Pour over bread. Stir to coat bread.
3. Mix in chocolate and pistachios. Cover and refrigerate for at least 4 hours, or overnight.
4. Preheat oven to 325 degrees F. (I removed the batter from the fridge about 30 min before baking to let it come to room temperature).
5. Line muffin tin with paper cups and scoop batter into tins. The batter should be mounded up (and the muffin tins very full since the muffins won't rise at all).
6. Bake for 40-50 min until crusty on top and muffins are cooked through.

Breakfast Egg Casserole
6 - 10 pieces of bread
6 eggs
3 c. milk
1 tsp mustard
1 tsp salt
(pepper if desired)
1 chopped green bell pepper
chopped basil
~ 1/4 c. rehydrated sundried tomatoes
1 package veggie breakfast sausage
1 1/2 - 2 c. grated cheddar cheese
1. Grease a 9 x 13" baking pan. Tear bread into chunks and cover the bottom of the pan.
2. Beat eggs, milk, mustard and salt until smooth. Set aside.
3. Layer the bell pepper, basil, sundried tomatoes, breakfast sausage over the bread and top with cheddar cheese.
4. Pour egg mixture evenly over the ingredients in the pan.
5. Cover and refrigerate overnight.
6. Remove 30 min prior to baking and preheat oven to 350oF. Bake for 40-50 min until cooked through in the centre and egg mixture has become puffy/golden brown on top.
These are just suggestions; you could add a variety of vegetables and spices like corn and jalapenos, or green onions, or feta, etc to the egg casserole instead!
Saturday, April 23, 2011
Good Friday Fish Supper
Since this is the first year that I can recall not having spent Easter with my family and thus planning a large Easter supper, wife and I decided to mix things up a bit and have a very small Good Friday supper with one other friend and a Holy Saturday brunch! Yes I know it's not time to celebrate yet, but it definitely is becoming something like a long food vigil of cooking my way towards Easter.
Friday's fish supper ended up including: Newfie salt fish cakes (salt fish, mashed potato, & onions fried up in delectable patties) courtesy of M., roasted cauliflower tossed with lemon juice, olive oil, minced garlic and Cajun spices, fish in spicy coconut cream sauce, bakes, and homemade mango cardamom ice cream. Suffice to say, the meal started around 6pm and didn't end til about 11:45pm. And yes we could have fed about 6 other people.
I'm most excited to share about the fish in spicy coconut cream sauce because a) the sauce is amazing and b) it came in the most lovely homemade cookbook that one of our friends sent us as a Christmas present last year. Although this dish is made with fish, this sauce would be incredible served over any assortment of vegetables, tofu, and/or rice! I also have to share about the bakes because a) they're Guyanese and b) they're a type of fried bread - who doesn't love fried bread?? Thanks N. for introducing me to bakes! oh yes and c) because I'm afraid of frying things in lots of oil, so I am working on conquering this particular fear!

Bakes (makes about 30-40 bakes; cut the recipe in half to serve 2-3 people)
4 c. all purpose flour
2 tsp baking powder
1/2 c. sugar (can reduce down to 1/4 c. sugar)
1/2 tsp salt
3-4 Tbs margarine
1/4 - 1/2 c. water
canola oil
1. Mix the dry ingredients together and cut in the margarine (can use your hands if you want).
2. Add water, starting with 1/4 c. and mix. Continue adding water until you have a stiff, soft dough that sticks together. (if you end up adding more than 1/2 c., it's probably okay. I just kept adding water until it seemed dough-like).
3. Knead the dough for a couple of minutes until smooth, but not too soft.
4. Let sit for 30-45 min.
5. Roll out on a floured surface into a rectangle 1/2" thick.
6. Cut into squares, rectangles, or triangles, as your heart desires. Piece size should be no bigger than 2" x 4".
7. Heat canola or veggie oil in a cast iron pan on med-high heat (~ 1/4" deep). Fry bakes til dark golden brown on each side.

Fish in Spicy Coconut Cream (serves 4-6)
2 tsp canola oil
3-4 cloves garlic, crushed
2- 3 Tbs minced fresh ginger
2 small red chillies, thinly sliced (can use dried chillies)
1 1/2 c. veggie stock
400 mL can coconut milk
1 tsp - 1 Tbs fish sauce*
1/2 tsp turmeric*
1 stick fresh lemon grass, beaten, and chopped into pieces
Juice of 1 lime
1 Tbs tamarind paste*
1/4 c. panela (or palm sugar, raw sugar, etc. even brown sugar)*
4 - 6 white fish fillets (a firm fish like cod or tilapia)
2 green onions, thinly sliced
*all starred ingredients were added to taste but not carefully measured. Remember you can start small and always add more but you can't undo too much turmeric or fish sauce!
1. Heat oil in a big wok or frying pan (BIG). Add garlic, ginger, and chili, frying until fragrant.
2. Add stock. coconut milk, fish sauce, turmeric, lemon grass, lime juice, tamarind paste, and panela, bringing to a boil. Let simmer for 10-15 min, tasting and adjusting as flavors as needed.
3. Add fish fillets, reduce heat and simmer, covered, until fish is cooked (about 6-10 min depending on the size of the fillets). Don't overcook the fish!
4. Add the green onions to the sauce (or just add as garnish on top) and serve the fish and broth over rice.

Thursday, April 21, 2011
Spring Tabbouleh (or UGO)
UGO's, or as I like to call them Unidentified Grain Objects, are a hazard of my depression-era mentality. In other words, when I have friends who move away, I can't bear to see them discard the contents of their kitchen into the garbage. So I make the last run to pick up the odds and ends of spices, condiments, and pantry contents. In most cases, this ends up creating a culinary challenge by adding spices to my kitchen that I've never heard of, or in other cases, for friends who had severe wheat allergies and intestinal disorders, unlabeled grains that I really have no idea about. Case in point, there is a bag in my refrigerator of small beige granules that about once every two weeks I ask my wife about: "Is this your yeast?" "NO! For the last time, it's some grain that you got from __" My new policy is: when in doubt about a grain, add to boiling water and keep testing until done. Then try to match the cooked product with online photos to figure out what you have!
The UGO of the week, after being cooked and compared to online photographs, was determined to be bulgur wheat, which honestly I should have recognized since I've used it before. The ones in the fridge are still unknown.. but since I did have cooked bulgur wheat on hand, I remembered one of Heidi's recipes from 101cookbooks.com that is a quintessential spring dish (not to mention fast and tasty!)
Spring Tabbouleh
1 cup fine bulgur (I used medium-large, so it actually required boiling rather than soaking)
1 bunch of asparagus, cut into 1/2-inch segments
1 cup peas, fresh or frozen
salt and pepper to taste
2-3 garlic cloves, minced
1 - 2 lemons, juice only (start with juice of 1 and go from there)
1/4 cup extra-virgin olive oil
1 bunch chives, finely chopped
1 cup walnuts, toasted and chopped (I used raw)
2 hard-boiled eggs, chopped
1. Place bulgur in a bowl and add boiling water (until surface of grains are covered). Let sit for about 15 minutes until tender. (Alternately bring water to a boil in a small pan, stir bulgur in and cook until done. Drain off excess water).
2. Bring a pot of water to a boil (with ~1/2 tsp salt). Cook the asparagus and peas for just about 20-40 seconds, just long enough for the asparagus to become slightly tender/bright green. Drain and run under cold water to stop the cooking. (This is called blanching!)
3. Combine the bulgur, asparagus, peas, eggs, walnuts, and chives in a bowl. (Feel free to use discretion about the amount of walnuts and chives you want).
4. Whisk the garlic, lemon juice, and olive oil together. Pour over the rest of ingredients. Toss and adjust to taste.

Wednesday, April 20, 2011
Warning: May Crack Under Pressure
One item of great importance re: my last post on no knead bread. After 4 months of using my corningware ceramic casserole dish for no knead bread, it has developed a huge crack down the centre rendering it unsafe for further bread (or cooking). So this is my warning to the rest of you: a cast iron pot/dutch oven is a necessity! And now I must go buy one in addition to a new casserole dish. If only Le Crueset were reasonably affordable, this is what I would be buying:
 Instead I will resign myself to the far more practically priced KitchenAid version and hope they are on sale at Canadian Tire!
Also - I have tried the molasses-oat version by substituting spelt (1/2 c. rolled spelt and ~ 1/4 c. ground spelt soaked with the boiling water and molasses) and very much enjoyed it!

Also - I have tried the molasses-oat version by substituting spelt (1/2 c. rolled spelt and ~ 1/4 c. ground spelt soaked with the boiling water and molasses) and very much enjoyed it!
Tuesday, April 19, 2011
Green Lentil/Wild Rice Burritos
Another one of my downfalls in the kitchen has been my crock pot. In theory, the crock pot is easy to work with and a wonderful time saver. My own experience has been more along the lines of undercooked rice/grains or the other extreme of a burned layer of crock pot contents. But I believe that people love crock pots for a reason so I decided to give the it another chance. A dear friend sent me a link to this recipe, which I modified to suit my vegetarian nature and the ingredients already on hand :)

Green Lentil/Wild Rice Burritos (makes enough to feed a large group, or 2 for more than a week!)
1 1/2 c. green lentils
1 c. wild rice
2 c. water
3. vegetable stock
1 - 1 1/2 c. diced onion
1 - 1 1/2 c. diced carrots
1 c. chopped bell pepper
1 c. diced tomatoes
6 cloves minced garlic
1 c. tomato juice or sauce (not italian flavored)
2 Tbs ground cumin
1-2 Tbs mexican chili powder (or taco seasoning)
1 Tbs oregano
3-4 bay leaves
1 dried ancho chili (can use 2, or of another chili variety like chipotle, guajillo, etc.)
salt and pepper to taste
Flour or corn tortillas
(1) Rinse the lentils and rice, let soak overnight in the crockpot (off) with the 2 c. water.
(2) The next day, pour out most of the water. Add in the veggie stock, vegetables and spices. Turn on low for 8 hours.
(3) Remove the guajillo chili and season with salt and pepper to taste. (or adjust other seasonings)
(4) Roll up in tortillas with lime juice, cilantro, grated cheddar cheese, sour cream, and/or salsa!
Sunday, April 17, 2011
Friday afternoon muffin bake
Despite the fact that it's one of the sunniest days I've yet to see this spring, and sun is glistening on the fresh snow in the distant mountains, I am inside baking. No complaints though because if I need to run to the store in the middle of a recipe, I don't need gum boots, a rain slicker, and an umbrella! And I can go bask outside on a lawn chair (admittedly still wearing a hoodie and jeans) with a book while the muffins are in the oven.
 This recipe is based on Anne's Bran Muffin recipe from The Grand Central Baking Book. I'm not sure how their muffin recipe yielded 12 muffins unless they have giant muffin tins, so that's the reason for the extremely odd number of muffins produced below. I would rate these muffins a success! An aside to baking: while most recipes say to fold the dry ingredients into the wet ingredients, I always do the reverse, using a large bowl to hold the mixed dry ingredients and a smaller bowl to hold the wet ingredients. No baking items have been injured in this manner.
Buttermilk Bran Muffins (makes ~18-19 muffins)
1/2 c. packed brown sugar
1/2 c. butter
1/3 c. molasses
2 large eggs
1 c. buttermilk
1/4 c. yogurt (alternately just use 1 1/4 c. buttermilk)
1/2 c. applesauce
3/4 c. wheat bran
1 1/4 c. all-purpose flour
1/4 c. whole wheat flour
2 tsp baking powder
1 tsp baking soda
1/2 tsp salt
1/2 c. - 3/4 c. chopped walnuts
1 c. raisins (or currants or chopped dried apricots)
(1) Preheat the oven to 325 degrees F. Line two muffin tins with paper liners. Whatever cups you don't end up filling, remove liners and put a bit of water in.
(2) Whisk sugar down through applesauce together and add wheat bran in to soak.
(3) Whisk together all the dry ingredients in a bowl (reserving walnuts and dried fruits for later).
(4) Fold the wet ingredients into the dry mixture until just combined. Add the nuts and dried fruits in. This batter appears very runny compared to other muffin batters, but it works. You can always add in a little extra flour if you really want to.
(5) Scoop batter into the muffin tin, filling each cup 3/4 full (or as close as you can get!)
(6) Bake for 25 min until edges are browned and the centre of the muffin springs back when gently poked.

Tuesday, April 12, 2011
Mexican Coleslaw
Spring is in the air! Or at least I think it is, but this oscillation from bright sunny days to grey wintry ones and back is leaving me a bit seasonally discombobulated. However, I feel that urge for bright vegetable freshness after wintry, warm comfort foods so a Mexican coleslaw seemed like the perfect idea! And I must have been right because I've made two batches of it within the last week.
 P.S. I promise after this post, I will stop being such a lazy food photographer... thanks methods of healing for your cabbage field photo!
Mexican Coleslaw
1/2 head green cabbage, thinly sliced
2 - 3 large carrots, grated
10 -12 radishes sliced into thin strips
2 -3 jalapeno peppers, deseeded and diced
1 bunch of cilantro - about 1/2 c. - 3/4 c. finely chopped
3 - 4 limes
1/8 - 1/4 c. canola oil (adjust as needed based on the amount of lime juice you get.)
4 cloves of garlic, minced
2 tsp ground cumin
1 Tbs sugar
1/2 tsp salt
1/4 tsp freshly ground pepper
optional: julienned jicama, or chopped avocado
optional: add a bit of rice vinegar, or white vinegar to the dressing.
Combine all properly sized vegetables in a giant bowl. Juice the limes and combine the juice with the oil, minced garlic, cumin, sugar, salt and pepper. Zest the limes into the raw veggies, then pour dressing over and toss. Let sit 2-3 hours and toss occasionally. Adjust seasonings as necessary.
Excellent on tacos and with hard-boiled eggs!
Monday, April 11, 2011
Goat Cheese Brownies
Goat cheese is high up on my list of favorite cheeses for its tangy, smooth, and infinitely flexible nature in its pairings with foods and flavors. You could use it anywhere you could use cream cheese so it occurred to me that the giant log of goat cheese (chevre) sitting in my fridge could be part of an exciting new adventure: goat cheese brownies! Of course I am not the first person to come up with this idea and I enjoyed reading about these industrious women and their brownie company: http://www.vermontbrowniecompany.com/dark-chocolate-chevre.html. I also found another food blogger who made some attempts at these brownies, and I ended up modifying her recipe for the chevre swirl and adding it to Jamie Oliver's brownie recipe as the base. The end result: a classy brownie dessert that hits the sweet and salty craving right on the nose!
Goat Cheese Brownies
Chevre Swirl
8 oz goat cheese (room temperature)
1 egg + 1 egg white
1 Tbs flour
Beat all ingredients together until silky smooth.
Brownie Base
1 c. unsalted butter + 2 Tbs salted butter
7 oz dark good quality chocolate (I used Callebaut dark chocolate pieces)
1/2 c. all purpose flour
1 1/2 c. granulated sugar
1 Tbs baking powder
3/4 c. cocoa
4 eggs
sea salt
Preheat oven to 350 degrees F.
Melt the butter and chopped up chocolate in a double boiler, or a thick-bottomed pan over low heat, stirring constantly til smooth. Sift together the dry ingredients. Beat together eggs (and vanilla if desired). Stir the melted chocolate and butter into the dry ingredients until mixed and then beat in eggs until smooth.
Pour into greased 9x13 pan. Spread chevre mixture on top and cut swirls through to produce marbling effect. Sprinkle with sea salt as desired. Bake 25-35 minutes until outer edges are done and middle is still slightly gooey.
Picture to come....
 |
| Photo courtesy of my beautiful wife! |
Goat Cheese Brownies
Chevre Swirl
8 oz goat cheese (room temperature)
1 egg + 1 egg white
1 Tbs flour
Beat all ingredients together until silky smooth.
Brownie Base
1 c. unsalted butter + 2 Tbs salted butter
7 oz dark good quality chocolate (I used Callebaut dark chocolate pieces)
1/2 c. all purpose flour
1 1/2 c. granulated sugar
1 Tbs baking powder
3/4 c. cocoa
4 eggs
sea salt
Preheat oven to 350 degrees F.
Melt the butter and chopped up chocolate in a double boiler, or a thick-bottomed pan over low heat, stirring constantly til smooth. Sift together the dry ingredients. Beat together eggs (and vanilla if desired). Stir the melted chocolate and butter into the dry ingredients until mixed and then beat in eggs until smooth.
Pour into greased 9x13 pan. Spread chevre mixture on top and cut swirls through to produce marbling effect. Sprinkle with sea salt as desired. Bake 25-35 minutes until outer edges are done and middle is still slightly gooey.
Picture to come....
Saturday, April 09, 2011
Sunny-Side Up
So tonight's dinner was a quickie experiment of a Bon Appetit recipe for fried eggs & greens. I followed the recipe, more or less, and am posting the modified version with changes I would make the next time that I prepare it. Overall though, I was pleased with the flavours, textures, and surprising lightness of the meal. Relatively quick, but a bit pan-intensive
Sunny-Side Up Eggs on Mustardy Greens
(2 servings)
1/2 c. coarse fresh bread crumbs (I took a piece of slightly stale bread and chopped it into squares, a 1cm side square was a bit too large).
4 -5 tsp Dijon whole grain mustard
3 tsp olive oil
9 oz total of fresh kale (stems removed) and/or spinach
3 Tbs whipping cream (or half and half)
1/2 tsp dried thyme
black pepper
2 large eggs
Parmesan (optional)
LEFTOVERS.
I had leftover spinach/kale mixture and bread crumbs so I packed it all in my tupperware for lunch along with a hard-boiled egg. I actually enjoyed it more the second day! Maybe the flavors had more time to meld perfectly with the greens, but reheating it with bread crumbs and parmesan on top and adding a hard-boiled egg was delicious!
 |
| What a professional food shot of this dish looks like... |
Sunny-Side Up Eggs on Mustardy Greens
(2 servings)
1/2 c. coarse fresh bread crumbs (I took a piece of slightly stale bread and chopped it into squares, a 1cm side square was a bit too large).
4 -5 tsp Dijon whole grain mustard
3 tsp olive oil
9 oz total of fresh kale (stems removed) and/or spinach
3 Tbs whipping cream (or half and half)
1/2 tsp dried thyme
black pepper
2 large eggs
Parmesan (optional)
- Preheat oven to 400 degrees F. Toss bread crumbs with 2 tsp olive oil and some thyme. Spread on baking sheet and bake for 6-8 min until golden and crisp. Set aside to cool.
- In a deep skillet, cook the kale over med heat with ~ 2 cm of water in the pan. When it's almost cooked, add the spinach in and cook until wilted.
- Strain cooked kale and spinach, pressing out any extra water. Then put back in skillet and add 4 tsp mustard, cream, and thyme. (This is supposed to thicken, but it never did for me). I also think a little butter might be a great addition at this point. Add freshly cracked black pepper and remove from heat. (To save yourself a pan, you could scoop the mixture out onto the 2 plates and put it in the oven to keep warm. Reuse the pan for the eggs).
- Fry up the eggs in 1 tsp olive oil. Split the spinach/kale mixture between plates, top with eggs, bread crumbs, and parmesan.
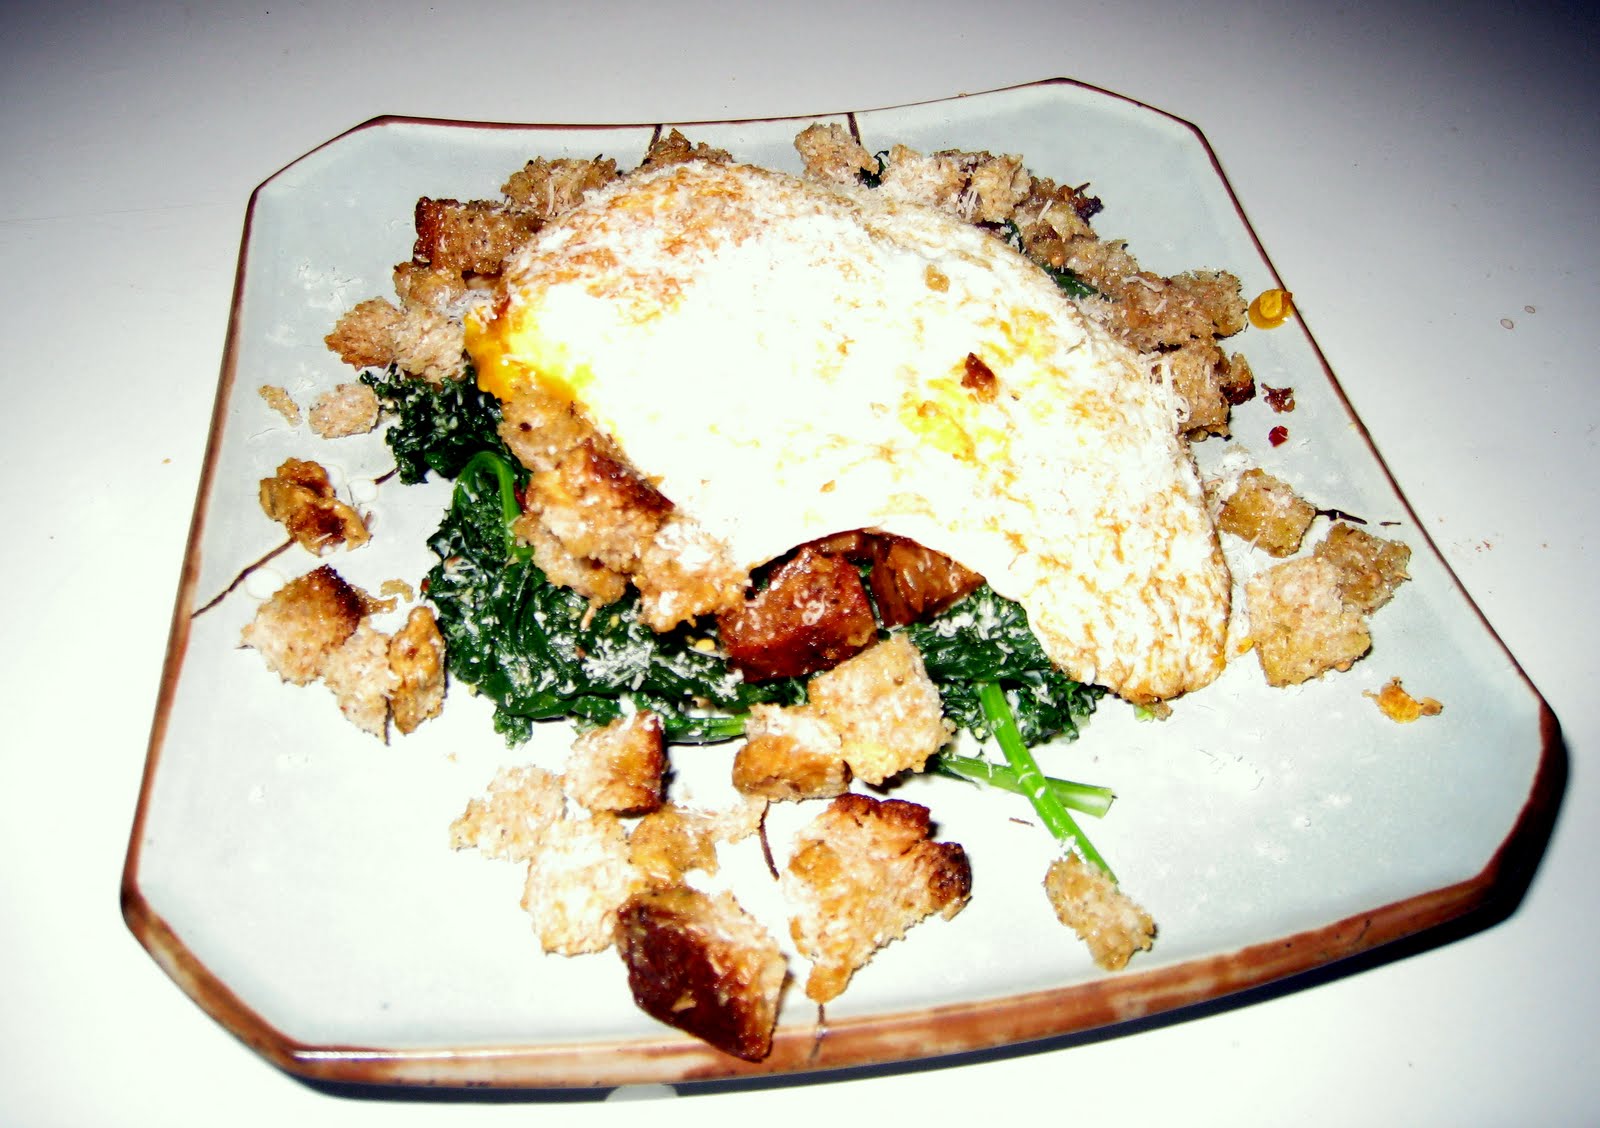 |
| What my food shot looks like... |
LEFTOVERS.
I had leftover spinach/kale mixture and bread crumbs so I packed it all in my tupperware for lunch along with a hard-boiled egg. I actually enjoyed it more the second day! Maybe the flavors had more time to meld perfectly with the greens, but reheating it with bread crumbs and parmesan on top and adding a hard-boiled egg was delicious!
Thursday, April 07, 2011
Semi-Famous or Something Like It
Okay not even really close to semi-famous, but I had to preen a bit this week as one of my friends asked for my buttermilk-chai-ginger scone recipe to prepare for a party of moms. It was such a smash hit that they want to publish it in their little neighborhood newsletter! How's that for satisfaction? So although I don't have any photos of the recipe as made yet, I will go ahead and post the recipe in case anyone else needs it!
Buttermilk-Chai-Ginger Scones
2 c. all purpose flour
1 Tbs baking powder
1/3 c. sugar
a dash of salt
1/2 - 3/4 tsp cinnamon
1/2 tsp ground cardamom
1/4 tsp ground cloves
1/3 c. butter
1/3 - 1/2 c. diced candied ginger
1 c. buttermilk (I rarely buy buttermilk and just use 1 c. milk to which 1 Tbs. vinegar, white or cider, has been added and let sit for 5 min or so)
Preheat oven to 375 degrees F.
Sift dry ingredients together and cut in butter until the dough has a similar texture to coarse cornmeal with small pea-sized pieces of butter floating around. Stir in the candied ginger.
Pour in the buttermilk and mix in using no more than 10 strokes. As little handling as possible means a more tender dough.
Turn the dough out onto a lightly floured surface and knead 3-5 times until it comes together. You can add a bit more flour if too sticky.
Pat into a round about 1 - 1 1/4 inch thick and cut into 8 wedges. Place on baking sheet and make sure to leave room between the wedges as they will expand. Bake for 20-30 minutes (tops should be golden brown) and remove from oven. Let cool. Stores well in ziploc plastic bags for 3 days.
Tuesday, April 05, 2011
No-Knead Bread
One of my new years resolution was to not buy any more store bread! Firstly, because the ones that I really like, that are hearty and full of grains (and not preservatives), are so expensive ($3.99/loaf). Secondly, because they come in plastic bags (see post # 2).
My mom has become enamored with the NYTimes no-knead bread recipe but has steadily chipped away and added to make the recipe more to her liking. Her newest version is my favorite yet and we recreated it on her last night here for the Tofino visit.
Molasses-Oat No Knead Bread
2 c. whole wheat flour
1 1/4 c. bread flour
1/2 c. rolled oats
3 Tbs molasses
1 1/2 tsp salt
heaping 1/4 tsp of yeast.
2 c. water
1) Stir together the whole wheat flour and bread flour in a large bowl.
2)Boil 2 cups of water and add to a separate bowl with the oats, molasses and salt. Leave to soak.
3) When the water has cooled to "warm" as opposed to "hot" (ie you can comfortably stick your pinky finger in and leave it there for a bit), add in the yeast and (if it's not instant yeast) let sit for 15 min. There should be little bubbles on the top indicating that the yeast is fermenting!
4) Stir wet ingredients into dry just until mixed. This should be a sticky dough, so you can add a bit more bread flour if needed.
5) Cover bowl with saran wrap (or a towel) and leave in a warm place to rise for 18 hours (so yes you do have to plan in advance with this bread!) After 18 hrs, stir in 2 Tbs bread flour and let rise again for 2-4 hrs.
6) Preheat oven to 450 with the dutch oven or casserole dish INSIDE DURING THE PREHEAT. Leave the dish in the oven, with the lid off, for 30 min.
7) At the end of 30 min, scoop the dough into the dish and cover with lid. Bake for 30 min, then remove the lid and let it finish baking for 15 -20 min. Remove from oven and turn the bread out onto a cooling rack. When cooled, store in a paper bag to keep the lovely crusty edges.
My mom has become enamored with the NYTimes no-knead bread recipe but has steadily chipped away and added to make the recipe more to her liking. Her newest version is my favorite yet and we recreated it on her last night here for the Tofino visit.
 |
| Crunchy exterior, moist interior! |
Molasses-Oat No Knead Bread
2 c. whole wheat flour
1 1/4 c. bread flour
1/2 c. rolled oats
3 Tbs molasses
1 1/2 tsp salt
heaping 1/4 tsp of yeast.
2 c. water
1) Stir together the whole wheat flour and bread flour in a large bowl.
2)Boil 2 cups of water and add to a separate bowl with the oats, molasses and salt. Leave to soak.
3) When the water has cooled to "warm" as opposed to "hot" (ie you can comfortably stick your pinky finger in and leave it there for a bit), add in the yeast and (if it's not instant yeast) let sit for 15 min. There should be little bubbles on the top indicating that the yeast is fermenting!
4) Stir wet ingredients into dry just until mixed. This should be a sticky dough, so you can add a bit more bread flour if needed.
5) Cover bowl with saran wrap (or a towel) and leave in a warm place to rise for 18 hours (so yes you do have to plan in advance with this bread!) After 18 hrs, stir in 2 Tbs bread flour and let rise again for 2-4 hrs.
6) Preheat oven to 450 with the dutch oven or casserole dish INSIDE DURING THE PREHEAT. Leave the dish in the oven, with the lid off, for 30 min.
7) At the end of 30 min, scoop the dough into the dish and cover with lid. Bake for 30 min, then remove the lid and let it finish baking for 15 -20 min. Remove from oven and turn the bread out onto a cooling rack. When cooled, store in a paper bag to keep the lovely crusty edges.
Monday, April 04, 2011
Tofino and Ucluelet
Well, we had a wonderful weekend in Ucluelet and Tofino: absolutely incredible coastal scenery and no tourists to compete with. Even the drive between Port Alberni and the Ucluelet/Tofino junction was breath-taking: snow covered peaks hemming you in, and along the side of the road, a carpet of snow studded with paper-white barked birches and scarlet tipped bare shrubs with a blue green river alternately rushing and meandering over beds of smooth, gray rocks! Our time in Ucluelet reminded me of how much I love fog-soaked pine trees, the varied hues of gray stone upon ocean upon sky, and the sound of the ocean lulling me to sleep. We couldn't have asked for a better place to stay than the place I found online: the cabins. Simple but warm wood interiors, a kitchen to prepare meals in, a tiny electric fireplace, a giant two person soaker tub, and stairs right down to Terrace Beach and part of the Wild Pacific Trail! We even barbequed a salmon once the furious winds died down a bit!

Salmon a la West Coast
One salmon fillet (deboned, skin on one side)
Maple syrup
Garlic
Cracked black pepper
Salt
Chop or mince about 3-5 cloves of garlic depending on the size of your fillet and your affinity for the taste of garlic. Put the salmon in a pan and pour over enough maple syrup to marinate the fish. Sprinkle the garlic on top of the fillet with fresh cracked black pepper and salt to taste. Let sit for 30 min. Barbeque on a sheet of foil, and flip the fish once. Serve when done.
Of the food we did not prepare ourselves, we ended up eating at Goats on the Roof Old Country Market, Norwoods, and Wildside Grill.
 Much to my child-like disappointment, the goats were not on the roof in Coombes, perhaps because it was still winter so the goats were hanging out in the tree house in the back. The Market was incredible: the many colored lanterns decorating the ceiling, the food on the shelves, the childrens' toys, and the kitchen wares. It has both a cafe and restaurant. From the cafe, I think I would stick with the desserts after trying a selection of the flatbreads and pizzas. We tried a "beesting" - which omg - a danish cut in half and filled with bavarian cream, then slathered on top with a caramel sauce and almonds?! Proceed with caution: at least one other person to help and a strong americano to go with it. I would have gone back for seconds if I could have fit them.

Norwoods is an upscale restaurant for the area, Pacific-northwest style of cuisine, locally made ingredients and some emphasis on sustainable seafood. The interior is cozy and intimate with maybe 8 - 9 tables and the bar. The kitchen is totally exposed, which I love. Watching the chefs cook and plate is an additional perk! Very attentive service. The food was sadly a mix of ups and downs. We had a seafood trio appetizer : dungeness crab chowder, tempura prawns, and grilled octopus and Dad had the mussels. The mussel broth was superb - spicy, tomato broth richness. Of the trio, the grilled octopus blew us all away.

The octopus was topped with watercress and served with truffle oil pureed potatoes and a sweet chili sauce. The combo was perfect in every way, and never having had octopus before, I am now a convert. The mains were hit and miss - the braised lamb shank was sous-vided and served with sauteed spinach, mushrooms and a potato cake. Well-received by two of our table. The other two went with the seared albacore tuna, tempura prawns, ponzu sauce, noodles and bok choi. Unfortunately the best part of that dish was the bok choi and prawns. The tuna, although seared, was mostly cold, which I have never experienced before with a fish dish, and the breading on the outside was not crisped at all. It was also slightly fishy tasting. They were kind enough to try a second time and completely remade the dish, managed the get the breading crispy but the tuna was still mysteriously cold and slightly fish tasting. This dish swam in ponzu sauce, and there were so many noodles which while great with the sauce and bok choi were too much texture contrast for what should have been a delicate fish. Chambar has ruined me in terms of restaurant fish experience: every single piece of fish I have had there is perfectly cooked and fresh-tasting, paired with amazing sides.
Dessert was a thankful redemption and provided new inspiration for my next cheesecake creation: goat cheese cheese-cake topped with poached sour cherries and a crust of hazelnut crumble. The crust was spectacular - the roasted hazelnut flavor paired so well with the goat cheese of the cheesecake and the crumble was much lighter and less buttery tasting than a traditional graham cracker crust. Must try!
 Wildside Grill located off the highway to Tofino and nestled in a little enclave of surf shops was the highlight of my eating out trip. I had been hoping to compare its fish tacos to those of Tacofino which was sadly closed due to it being low tourist season. But these tacos did not disappoint! $13 for 3 corn tortillas filled with chipotle mayo, guacamole, fresh salsa, cilantro, and a tempura battered piece of cod. They were mostly inhaled :) My one tiny complaint is that the chipotle mayo was a little excessive and while I loved all the veggies/condiments, it would have been nice to taste a bit more fish! Their fish and chips were also delightful - wonderfully crunchy panko exterior on the cod, perfectly salted thick chips, lots of tartar sauce and cole slaw. The cole slaw got points for using julienned green apple, but still tasted too much of mayonaisse for my liking. I am completely in the vinegar slaw camp.The hilarious part was sitting outside eating fish & chips and fish tacos, while dressed in fleece, rain jackets, hiking boots, and toques! That's some northwest spring time for you!


Salmon a la West Coast
One salmon fillet (deboned, skin on one side)
Maple syrup
Garlic
Cracked black pepper
Salt
Chop or mince about 3-5 cloves of garlic depending on the size of your fillet and your affinity for the taste of garlic. Put the salmon in a pan and pour over enough maple syrup to marinate the fish. Sprinkle the garlic on top of the fillet with fresh cracked black pepper and salt to taste. Let sit for 30 min. Barbeque on a sheet of foil, and flip the fish once. Serve when done.
Of the food we did not prepare ourselves, we ended up eating at Goats on the Roof Old Country Market, Norwoods, and Wildside Grill.
 Much to my child-like disappointment, the goats were not on the roof in Coombes, perhaps because it was still winter so the goats were hanging out in the tree house in the back. The Market was incredible: the many colored lanterns decorating the ceiling, the food on the shelves, the childrens' toys, and the kitchen wares. It has both a cafe and restaurant. From the cafe, I think I would stick with the desserts after trying a selection of the flatbreads and pizzas. We tried a "beesting" - which omg - a danish cut in half and filled with bavarian cream, then slathered on top with a caramel sauce and almonds?! Proceed with caution: at least one other person to help and a strong americano to go with it. I would have gone back for seconds if I could have fit them.
Norwoods is an upscale restaurant for the area, Pacific-northwest style of cuisine, locally made ingredients and some emphasis on sustainable seafood. The interior is cozy and intimate with maybe 8 - 9 tables and the bar. The kitchen is totally exposed, which I love. Watching the chefs cook and plate is an additional perk! Very attentive service. The food was sadly a mix of ups and downs. We had a seafood trio appetizer : dungeness crab chowder, tempura prawns, and grilled octopus and Dad had the mussels. The mussel broth was superb - spicy, tomato broth richness. Of the trio, the grilled octopus blew us all away.

The octopus was topped with watercress and served with truffle oil pureed potatoes and a sweet chili sauce. The combo was perfect in every way, and never having had octopus before, I am now a convert. The mains were hit and miss - the braised lamb shank was sous-vided and served with sauteed spinach, mushrooms and a potato cake. Well-received by two of our table. The other two went with the seared albacore tuna, tempura prawns, ponzu sauce, noodles and bok choi. Unfortunately the best part of that dish was the bok choi and prawns. The tuna, although seared, was mostly cold, which I have never experienced before with a fish dish, and the breading on the outside was not crisped at all. It was also slightly fishy tasting. They were kind enough to try a second time and completely remade the dish, managed the get the breading crispy but the tuna was still mysteriously cold and slightly fish tasting. This dish swam in ponzu sauce, and there were so many noodles which while great with the sauce and bok choi were too much texture contrast for what should have been a delicate fish. Chambar has ruined me in terms of restaurant fish experience: every single piece of fish I have had there is perfectly cooked and fresh-tasting, paired with amazing sides.
Dessert was a thankful redemption and provided new inspiration for my next cheesecake creation: goat cheese cheese-cake topped with poached sour cherries and a crust of hazelnut crumble. The crust was spectacular - the roasted hazelnut flavor paired so well with the goat cheese of the cheesecake and the crumble was much lighter and less buttery tasting than a traditional graham cracker crust. Must try!
 Wildside Grill located off the highway to Tofino and nestled in a little enclave of surf shops was the highlight of my eating out trip. I had been hoping to compare its fish tacos to those of Tacofino which was sadly closed due to it being low tourist season. But these tacos did not disappoint! $13 for 3 corn tortillas filled with chipotle mayo, guacamole, fresh salsa, cilantro, and a tempura battered piece of cod. They were mostly inhaled :) My one tiny complaint is that the chipotle mayo was a little excessive and while I loved all the veggies/condiments, it would have been nice to taste a bit more fish! Their fish and chips were also delightful - wonderfully crunchy panko exterior on the cod, perfectly salted thick chips, lots of tartar sauce and cole slaw. The cole slaw got points for using julienned green apple, but still tasted too much of mayonaisse for my liking. I am completely in the vinegar slaw camp.The hilarious part was sitting outside eating fish & chips and fish tacos, while dressed in fleece, rain jackets, hiking boots, and toques! That's some northwest spring time for you!
Subscribe to:
Posts (Atom)