I feel so neglectful of this blog, but I do have things in the works! It's just that pre-holiday season where everything seems to happen - craft sales to attend, parties to go (or plan to go to), gift-planning and making, interesting evening events, going on strike with your work (okay that's not normally in the mix), and planning a menu for about 52 people you may have invited to a holiday party that will take place in under 700 sq ft? I'm really really hoping this works out. In the meanwhile though, each weekend has a strict baking schedule to ensure I get through the line-up in time to pull off my (as some of my friends would call it "crazy", but I simply say "ambitious") menu list. In my defense, I have already removed one item...... and am considering letting go of the stuffed grape leaves.
So far, my success rate has been about 80%. I have tested all the desserts and found that my first chocolate peppermint cookie recipe (from food network) was not at all desirable. A chocolate mint cookie should be fudgey, decadent and the mint should be baked into the cookie, not an afterthought in the icing. Fortunately bon appetit provided the perfect replacement recipe. I also made a jam thumbprint cookie recipe that I wasn't completely happy with so I'll be testing that again. The orange spice pumpkin cakes are delicious even without glaze, as was the pumpkin seed brittle.
The spiced nuts are a vegan recipe which seemed more difficult to find than I would have expected. They are quite pleasing though the variability of cayenne spiciness with each handful can make it a bit of an adventure to eat :) I think I did scale back a bit and use about 3/4 tsp cayenne. A full review of all these items will come later. The only other recipe I want to offer a particular warning on is the making of crustless mini-quiches. I tried hands down the worst recipe (http://www.quincesandthepea.com/mini-spinach-crustless-quiches) and spent 6 batches trying to rectify this recipe, without any notable success. It ruined my monday off. They were ridiculously salty and completely overcooked. Ergo, in the list below I include a beautiful recipe that tasted incredible and worked on the first try. It's quite easy to substitute vegetarian sausage into the recipe. More details and photos on all this later, promise.
Here it is:
DRINKS
mulled wine - http://www.jamieoliver.com/recipes/other-recipes/jamie-s-mulled-wine#
mulled cider - http://www.foodnetwork.com/recipes/bobby-flay/mulled-cider-recipe/index.html
DESSERTS
orange spice pumpkin cakes spoonforkbacon.com/2012/10/a-wee-halloween-party/
molasses gingerbread
chocolate peppermint cookies
http://www.bonappetit.com/recipes/2010/12/double_chocolate_peppermint_crunch_cookies
pumpkin seed brittle
http://www.epicurious.com/recipes/food/views/Pumpkin-Seed-Brittle-231374
jam thumbprint cookies
orange candied ginger cookies - vegan from Extraveganza
DIPS/SPREADSmake crackers -raincoast crisps and vegan crackers
Curried sweet potato dip http://www.healthybitchdaily.com/post/curried-sweet-potato-dip-recipe
beet and orange hummus [VEGAN]
http://www.veggiebelly.com/2009/09/roasted-beet-and-orange-dip-with-walnuts.html
hot artichoke cheese dip
veggie crudites on hand plus baguettes
LITTLE MUNCHIES
spiced nuts [VEGAN] - http://allrecipes.com/recipe/sweet-and-spicy-almonds/
marinated olives [VEGAN] - buy
edamame - drizzled with sesame oil and sea salt and black pepper (this may be turned into a dip)
MAIN MUNCHIES
smoked salmon, chives & horseradish cream cheese on pumpernickel rounds
crispy proscuitto cups with marinated pear & goat cheese http://www.marthastewart.com/342213/crispy-prosciutto-cups-with-pear
baked brie (two) with fruit compote or pepper jelly
mini quiche - http://thecafesucrefarine.blogspot.ca/2012/02/quiche-bites-in-little-black-dress.htm
feta walnut date cigars http://www.epicurious.com/recipes/food/views/Feta-Walnut-Date-Cigars-365214
stuffed grape leaves
http://www.foodnetwork.ca/guides/holidays/recipes/recipe.html?dishID=10519
pineapple cubes with chili, scallions and peanut butter
http://www.bbcgoodfood.com/recipes/3790/galloping-horses
Tuesday, November 20, 2012
Friday, November 02, 2012
Chorizo-Chard -Black BeanStew
I find soup difficult to photograph - it always looks so flat on the surface and the broth seems to obscure the beautiful colors of the vegetables. Plus in the process of carrying the bowl to the table, inevitably broth and spices get splashed on the sides of what I aspired to be a pristine bowl interior above the broth line. Regardless - I can't complain any more about this soup because a) it made enough to feed us for an entire week (and that's really how I'm cooking now - whipping up one to two large meals or Saturday or Sunday and eating them all week long) and b) it was delicious, reasonably simple, and healthy! This soup is perfect for fall - onion, carrot, celery, chard, canned
tomatoes - with black beans and chorizo sausage (or in my case,
vegetarian sausage!) to make it a hearty and protein-rich meal!

Aside: I found a new food blog, The Bitten Word, where they came up with this great project to get volunteers to help them cook every single recipe in the six food magazines they receive for a month. The recipes are reviewed & photographed, but they're not "foodie" photographs for the most part - just nice to enjoy people who are all about the cooking and aren't too self-conscious about the photo they take of it (which clearly I am)!
If you don't have black beans, it is entirely possible to make this recipe with lentils (green lentils that won't fall apart in your stew) or cannellini beans - I just didn't have any - and actual chorizo sausage if you are a meat eater. I also just read this interesting comment on cooking dried beans: A cook at Saveur says: ”Here’s what we found out: soaking dried beans overnight is fine, and even good, in that it reduces the cooking time by at least a quarter, but if you have the time for a longer simmer, then soaking isn’t necessary. As for the quick-soaking method—i.e., bringing the beans to a boil and then letting them sit for an hour—we found that an hour in warm water made virtually no difference in the cooking time, so go for either the overnight soak or none at all. “
Chorizo-Chard-Black Bean Stew
1 c. dried black beans, cooked until medium tender
1 large onion, chopped or finely chopped
1-2 large carrots, diced
2 large stalks celery diced
6 cloves garlic, peeled, sliced
1 quart diced tomatoes and juice (or chopped tomatoes)
6-8 cups fresh chard (leaves only in this measurement - but use the stems in the soup), stems removed and diced, leaves chopped into 1 or 1.5 inch wide strips
4 -5 cups water or vegetable stock (I used 1 veggie boullion cube)
1 lb veggie chorizo sausage, sliced (2 of the artisan grain field meat brand)
oil for sauteing
salt and pepper to taste - if only using 1 veggie bouillon cube, likely to need 1-2 tsp salt
1. Beans - I wasn't prepared and hadn't soaked them over night. If possible, I would do this to reduce the soup cooking time. I used the quick boil method of bringing the beans in 3 to 4 c.of water to a boil, boiling for 10 minutes, and letting sit covered for 1 hour before draining and adding to the soup. They still ended up taking another 50 or 60 minutes of cooking in the soup to become tender.
2. In a big stockpot, saute the onion, carrots, celery and garlic in oil for a good 8-10 minutes until everything is nicely colored and the onion is turning golden/translucent. Add the chard stems and saute briefly.
3. Add in the water (or stock) and bouillon, salt, and the black beans. Bring to a boil and let simmer for about 40 minutes until the beans are tender. (this is important to make sure they're tender BEFORE adding the tomatoes).
4. Add the quart of tomatoes and the sausage and bring to simmer.
5. Add the chard leaves in and let simmer until wilted.Taste for salt and pepper and adjust as needed.
6. Serve with cheese toast, or possibly some crumbled goat cheese on top.
Thursday, November 01, 2012
Pear-cranberry crumble
Actually I believe it's a crisp, though who really knows what the true distinction is here. According to some sources of information, a crisp can include oats in the topping, but a crumble is more British, less sweet, and is a "streusel" of butter, flour, and sugar. I have seen a fair share of crumble recipes that include oats too though. I guess it is more appropriate to say I made a crumble (drum roll for the pun) as my hopes crumbled after I tasted this dish...
I had beautiful red organic pears from the farmers market, fresh cranberries and ginger - autumn colors, spice, delectable brown sugar oat topping - but something went awry. I blame the vanilla and the overly sweet combo of crisp topping and the filling ... Needless to say, I fed it to others who loved it regardless, thanks to those who so willingly eat what I make.

Yesterday, I tackled the recipe again, determined to correct for my earlier recipe foibles. I adapted the filling to lessen the sugar, completely remove the vanilla and add ginger/black pepper for spice. I also made up the crisp topping - which isn't quite 100% where I want it - if you have a crisp topping you love, feel free to substitute, but make sure to include some cinnamon and ginger in it!
Pear-Cranberry Crumble
Filling:
Crisp topping:
2. Stir the sugar and cornstarch together until well mixed. Stir together with the rest of the filling ingredients. If you want to save a dish, you can do this directly in the casserole dish to be used for baking. Set aside.
3. In another bowl, Stir together all the crisp ingredients except for the butter (and the nuts if using). Then cut in the butter until crumbly. I find hands can work better for this than a pastry cutter with the oats. Stir in nuts.
4. Evenly distribute the topping over the filling in a casserole dish (oval 2.5 qt) and bake for 40-50 minutes.
I had beautiful red organic pears from the farmers market, fresh cranberries and ginger - autumn colors, spice, delectable brown sugar oat topping - but something went awry. I blame the vanilla and the overly sweet combo of crisp topping and the filling ... Needless to say, I fed it to others who loved it regardless, thanks to those who so willingly eat what I make.

Yesterday, I tackled the recipe again, determined to correct for my earlier recipe foibles. I adapted the filling to lessen the sugar, completely remove the vanilla and add ginger/black pepper for spice. I also made up the crisp topping - which isn't quite 100% where I want it - if you have a crisp topping you love, feel free to substitute, but make sure to include some cinnamon and ginger in it!
Pear-Cranberry Crumble
Filling:
- 2 lbs (a bit less is fine too) of pears (before cutting), cored, sliced thinly
- 1 3/4 c. fresh cranberries
- 2 tsp minced ginger, fresh
- 1 Tbs lemon juice
- 1/2 - 1 tsp finely grated lemon zest
- 1/4 c. granulated sugar
- 1 Tbs cornstarch
- 1/4 tsp freshly ground black pepper
Crisp topping:
- 1/2 cup all-purpose flour
- 1 cup quick oats
- 1/3 cup packed brown sugar
- 1 teaspoon ground cinnamon
- Dash of salt
- 1/3 - 1/2 cup chilled butter, cut into small pieces
- 1/2 tsp ginger
- optional 1/4 c. chopped nuts (walnuts or pecans)
2. Stir the sugar and cornstarch together until well mixed. Stir together with the rest of the filling ingredients. If you want to save a dish, you can do this directly in the casserole dish to be used for baking. Set aside.
3. In another bowl, Stir together all the crisp ingredients except for the butter (and the nuts if using). Then cut in the butter until crumbly. I find hands can work better for this than a pastry cutter with the oats. Stir in nuts.
4. Evenly distribute the topping over the filling in a casserole dish (oval 2.5 qt) and bake for 40-50 minutes.
Tuesday, October 30, 2012
Hiking Snacks!
Although the rainy season has set in and the mountains are dusted with snow at the tops, I'm still trying to get outside for a couple of last hiking flings. The last "fling" was like being stood up for a date? (I'm not sure as that's never happened to me personally). After much research identifying an appropriate trail of suitable length for a rainy day hike, we arrived only to find that the trail was closed for area conservation! Fortunately it was a large marsh area so there was another stretch of dyke to walk along that was not closed so we trudged along in rain gear and umbrellas enjoying the outdoors, but enjoying even more the return to the city for americanos and doughnuts :) I cannot say enough about Lucky's doughnuts inside 49th parallel at main and 13th. Spectacular! 5 stars for every doughnut I've tried there, except the salted caramel.
But back to the healthy hiking snacks! Here are two I've made within the last week:
(1) chewy no-bake granola bars - excellent taste - a bit salty for me, perfect for wife as the recipe goes. BUT, they only stay as a solid bar while they are cold (in the fridge or freezer) due to the coconut oil so honestly they seem quite impractical as a hiking snack. I would keep them around for house snacks or winter snowshoeing, but not for summer trails.
Things I changed in the recipe: (1) substituted 3/4 c. dried cranberries for the dried cherries - personal preference (2) replaced pecans with walnuts - what was on hand (3) did not use vanilla or almond extract - not convinced I want to taste vanilla extract in my granola bars - I want to taste the nuts, oats and cinnamon! (4) IF I made it again, and used fine grain salt, I would reduce to 1/4 tsp.

(2) happy trail adventure cookies - a much more practical hiking snack that stays together at room temperature. Mine did not look anything like the original photograph, so I'm wondering if she actually flattened her cookie dough balls before baking. I did not and as you can see from the photo, they don't "melt" much on their own during baking. They are a touch on the sweet side for me, but pretty close to perfect so I wouldn't fiddle too much with the recipe.
Things I changed in the recipe: (1) substituted walnuts for pecans - again what I had on hand (2) subbed honey for brown rice syrup and (3) included the 1/3 c. sweetened cranberries. Actually if I bake these again (which I will), I would include 1/4 c. CHOPPED dried cranberries in addition to the 3 Tbs salted roasted pumpkin seeds.
 |
| Yes, you can hike with umbrellas |
 |
| A little Austen or Bronte to lighten the mood? |
 |
| Just beautiful landscape... |
But back to the healthy hiking snacks! Here are two I've made within the last week:
(1) chewy no-bake granola bars - excellent taste - a bit salty for me, perfect for wife as the recipe goes. BUT, they only stay as a solid bar while they are cold (in the fridge or freezer) due to the coconut oil so honestly they seem quite impractical as a hiking snack. I would keep them around for house snacks or winter snowshoeing, but not for summer trails.
Things I changed in the recipe: (1) substituted 3/4 c. dried cranberries for the dried cherries - personal preference (2) replaced pecans with walnuts - what was on hand (3) did not use vanilla or almond extract - not convinced I want to taste vanilla extract in my granola bars - I want to taste the nuts, oats and cinnamon! (4) IF I made it again, and used fine grain salt, I would reduce to 1/4 tsp.

(2) happy trail adventure cookies - a much more practical hiking snack that stays together at room temperature. Mine did not look anything like the original photograph, so I'm wondering if she actually flattened her cookie dough balls before baking. I did not and as you can see from the photo, they don't "melt" much on their own during baking. They are a touch on the sweet side for me, but pretty close to perfect so I wouldn't fiddle too much with the recipe.
Things I changed in the recipe: (1) substituted walnuts for pecans - again what I had on hand (2) subbed honey for brown rice syrup and (3) included the 1/3 c. sweetened cranberries. Actually if I bake these again (which I will), I would include 1/4 c. CHOPPED dried cranberries in addition to the 3 Tbs salted roasted pumpkin seeds.
 |
| Don't you love my fancy little fade out border around the edges?? |
Tuesday, October 23, 2012
Autumn = Soup
Don't you agree? As soon as the leaves turn and I have to start wearing a woolly hat or sweatshirt around, my mind immediately transitions to soup/stew mode as part of the "welcome fall" routine. I've been fortunate to stockpile sorrel soup in my freezer (less fortunate because now the freezer is completely full and I can't fit a single thing more in it!) but decided to make a simple lentil soup to get us through the week. Four or five days of feeding two people a meal of lentil soup - hooray! That's my kind of cooking :) I also was pleased that the recipe is fairly minimalist. Three vegetables, a legume, a fresh herb, and some basic condiments. Deborah Madison's Vegetarian Cooking for Everyone is the source of this belly-warming, light and nourishing fare. I did double the mustard and vinegar from her recipe to get a bit more kick out of it.
Lentil Vegetable Soup with Mustard and Parsley
2 Tbs olive oil or vegetable oil
2 c. diced onion
3-5 large garlic cloves, minced
3 Tbs tomato paste
1 1/2 c. green or brown lentils, rinsed (PICK THROUGH THEM FOR STONES - THEY REALLY EXIST)
2/3 - 1 c. diced celery (I prefer more vegetables in my soup so chose 1 c.)
2/3 - 1 c. diced carrot
2 - 3 bay leaves
1/2 - 3/4 c. chopped parsley
2 Tbs Dijon mustard
2 - 3 Tbs sherry or red wine vinegar
1. In a large soup pot, sauté the onion in hot oil for 5-7 minutes. Add the garlic and continue sautéing until the onion is tender and translucent. Add the tomato paste, 1 tsp of salt, celery, carrot, and parsley and cook for 3 minutes.
2. Pour in 2 quarts of water, the lentils,bay leaves, a dash or two of freshly ground pepper, and bring to a boil. Lower the heat and simmer, partially covered for 25-35 minutes.
3. Taste for salt - may need another 1/2 tsp - 1 tsp of salt. Make sure the lentils are tender. If not, continue simmering until done. Stir in the mustard and vinegar at the end. Add more pepper to taste (or vinegar/mustard) and remove the bay leaves.
4. Serve with a slice of crusty bread and enjoy.
 |
| Just realized how ridiculous the piece of carrot in the middle looks ... oh well |
2 Tbs olive oil or vegetable oil
2 c. diced onion
3-5 large garlic cloves, minced
3 Tbs tomato paste
1 1/2 c. green or brown lentils, rinsed (PICK THROUGH THEM FOR STONES - THEY REALLY EXIST)
2/3 - 1 c. diced celery (I prefer more vegetables in my soup so chose 1 c.)
2/3 - 1 c. diced carrot
2 - 3 bay leaves
1/2 - 3/4 c. chopped parsley
2 Tbs Dijon mustard
2 - 3 Tbs sherry or red wine vinegar
1. In a large soup pot, sauté the onion in hot oil for 5-7 minutes. Add the garlic and continue sautéing until the onion is tender and translucent. Add the tomato paste, 1 tsp of salt, celery, carrot, and parsley and cook for 3 minutes.
2. Pour in 2 quarts of water, the lentils,bay leaves, a dash or two of freshly ground pepper, and bring to a boil. Lower the heat and simmer, partially covered for 25-35 minutes.
3. Taste for salt - may need another 1/2 tsp - 1 tsp of salt. Make sure the lentils are tender. If not, continue simmering until done. Stir in the mustard and vinegar at the end. Add more pepper to taste (or vinegar/mustard) and remove the bay leaves.
4. Serve with a slice of crusty bread and enjoy.
Tie altering!
 |
| Not a food picture! Surprised? |

All in all this was a great two evening project. One to pick apart the tie, pull out the thin lining and cut it down, then iron the new fold lines for the tie and try to as invisibly as possible sew the tie closed :) Then re-iron and hang.
Saturday, October 20, 2012
Sweet and salty
My new favorite dessert - caramel corn with almonds and pretzels - served alongside a cup of dark roast decaf coffee. Playful, fun, but almost classy - almost since you do end up with sticky caramel on your fingertips ... Surprisingly, this turned up on Thanksgiving weekend and my mom was the one who became fixated on the idea of making this treat (unusual since I'm the one with the sweet tooth and she's not). While the first batch was an 80% success, the second batch I later tried turned out sooo much better and I saved one dish worth of washing - a huge improvement in my mind.
 The nice part is you can make up a big batch ahead of time! I'm not 100% certain that the marshmallows are needed in the caramel sauce. I used them since I had old marshmallows that I couldn't come up with any other purpose for. This recipe came from everybody likes sandwiches' blog but I doubled the sauce to make sure I had enough.... the leftover sauce was great on apple slices!
Salted Caramel Almond Pretzel Popcorn
6-8 c. plain popped popcorn
~1 1/2 c. coarsely chopped salted pretzels (I bought regular pretzels, but pretzel rods would have been easier to work with) - you can use more or less as desired
3/4 - 1 c. toasted almonds, coarsely chopped
1 1/2 c. sugar
1/3 + 1/6 c. heavy cream
1 c. marshmallows (regular or mini. If regular, chop into quarters)
sea salt or coarse salt
1. Pop your popcorn and set aside in a LARGE bowl (if it's lightly greased, it might help, but it could also not be greased). You can stir the almonds through also. Leave the pretzels aside for now.
2. In a medium sized saucepan (high walls are good), combine the sugar, almost a 1/2 tsp of kosher (regular) salt and 3/4 c. water. Bring to a boil and let boil uncovered for 8-12 minutes. It should turn a deep golden caramel shade. (You want beyond a pale yellow!) Remove from the heat and pour in the heavy cream in thirds, possibly stirring while doing so. It will foam up and/or splatter (hence the medium sized saucepan and adding in portions). Once it settles down, stir in the marshmallows and let sit (stirring occasionally) until melted.
3. Pour caramel over the popcorn and almond mixture, stirring to combine. After a minute, stir the pretzels through. At this point you can taste and add some coarse seas salt to taste. Let sit until cool and then nosh away! (or store it in a plastic bag for later).
Friday, October 19, 2012
Fall is in the air
And with fall a whole new spectrum of tasty meals that revolve around soups, stews, pumpkin, squash, hearty greens like kale, beets, apples, pears, cranberries - joy. At this Thanksgiving (Canadian that is), we tried out a whole slew of new recipes. Most if not all were ecstatically received! My particular favorite was Richard Blaise's (YES TOP CHEF) carrot osso bucco with creamy polenta. The rest of the table swooned over the parmesan roasted butternut squash, kale, and brussels sprouts from the little yellow kitchen blog.
I did a bit of modifying on the carrot osso bucco once I realized I would be making mushroom stock from scratch. (DO THIS IN ADVANCE!) As it turned out, the mushroom stock recipe that I made had me strain out the mushrooms, which I did. I wasn't sure if I was supposed to save or discard the mushrooms, but they were still jam-packed with flavor so I simply stirred them through the carrot osso bucco once it was finished and they were marvelous! I actually can't imagine serving this recipe without cooked mushrooms.
The only comment I would make about the recipe is when I used masala
curry powder, I found the clove factor a bit overpowering. If I made the
recipe again, I would reduce the curry powder, maybe 3/4 of the amount
and add at least 1- 2 Tbs. worchesthire sauce (this of course,
unvegetarianizes the recipe but for us pescatarians, not an issue). The
upside of this recipe is that it necessitates a trip to a gourmet
kitchen store/food store to buy porcini powder! Isn't that fancy? I was
fascinated to see that french porcini powder was at least one and a
half times the cost of italian procini powder. Who knew?
Carrot Osso Bucco.
Use the recipe carrot osso bucco. I doubled it to serve 5 with leftovers. Changes - decrease masala curry powder to 1 1/2 tsp for a doubled recipe and add 3-4 Tbs Worcestershire sauce. Try adding 1 1/2 Tbs dried porcini powder to start and after braising or 1 hour and 15 minutes, if the vegetables are tender, strain all the liquid out and reserve. Place the carrots and onions in a casserole dish and combine with mushrooms from stock (these should be warm/hot). Then reduce the braising liquid on the stove. Once the sauce is the desired thickness add salt and pepper to taste with more porcini powder if needed. Pour sauce over vegetables and serve with creamy polenta.
Mushroom Stock. Use the recipe, but replace the white wine with water or a low sodium vegetable broth. Add 1/2 tsp thyme - 1 tsp thyme and 1/4 - 1/2 c. freshly chopped parsley.
Creamy Polenta: I used this recipe - can reduce half-and half or replace with milk. Also add another 1/2 - 1 c. of water at the end to make polenta less thick as needed. Reduce butter to 2 Tbs. You can leave out the butter and parmesan if desired. (I made exactly the amount in the recipe).
Parmesan Roasted Brussels, Butternut Squash and Kale. I doubled the amount of brussels (approx 25-30) and used 2 bunches of kale (perhaps 8 c. chopped?). I also prepared the vegetables separately. To do this, I doubled the seasonings and then used roughly a third for each vegetable. The squash was tossed with seasonings and roasted for about 40 minutes without broiling. About 10 minutes before the squash was expected to finish, I sauteed the kale in a bit of oil briefly, added 1/4 c. of water, covered and steamed briefly - 4-5 minutes - check for burning and removed the lid to finish cooking, stirring through the seasoning and crisping up in the skillet. With the brussels I tried a similar method but wasn't at pleased. They could be roasted for about 20 minutes after tossing with seasoning (time with expected end time for squash) - this would be easiest. Or you could steam them for 3-5 minutes, roll them in seasoning and saute another 3-5 minutes just until tender. DO NOT OVERCOOK THEM.
We also cooked a favorite - kale mashed potatoes from epicurious!
Lastly for our dessert, I turned to the Grit for a coffee cream delight tart that was smooth, silky, a hint of coffee and a hint of chocolate. Perfect alongside a cup of strong coffee.
 |
| Thanksgiving Day walk |
I did a bit of modifying on the carrot osso bucco once I realized I would be making mushroom stock from scratch. (DO THIS IN ADVANCE!) As it turned out, the mushroom stock recipe that I made had me strain out the mushrooms, which I did. I wasn't sure if I was supposed to save or discard the mushrooms, but they were still jam-packed with flavor so I simply stirred them through the carrot osso bucco once it was finished and they were marvelous! I actually can't imagine serving this recipe without cooked mushrooms.
 |
| Carrot osso bucco (made with home-grown carrots) |
 |
| Parmesan roasted butternut squash, kale, and brussel sprouts |
 |
| Coffee cream delight (The Grit cookbook) |
Use the recipe carrot osso bucco. I doubled it to serve 5 with leftovers. Changes - decrease masala curry powder to 1 1/2 tsp for a doubled recipe and add 3-4 Tbs Worcestershire sauce. Try adding 1 1/2 Tbs dried porcini powder to start and after braising or 1 hour and 15 minutes, if the vegetables are tender, strain all the liquid out and reserve. Place the carrots and onions in a casserole dish and combine with mushrooms from stock (these should be warm/hot). Then reduce the braising liquid on the stove. Once the sauce is the desired thickness add salt and pepper to taste with more porcini powder if needed. Pour sauce over vegetables and serve with creamy polenta.
Mushroom Stock. Use the recipe, but replace the white wine with water or a low sodium vegetable broth. Add 1/2 tsp thyme - 1 tsp thyme and 1/4 - 1/2 c. freshly chopped parsley.
Creamy Polenta: I used this recipe - can reduce half-and half or replace with milk. Also add another 1/2 - 1 c. of water at the end to make polenta less thick as needed. Reduce butter to 2 Tbs. You can leave out the butter and parmesan if desired. (I made exactly the amount in the recipe).
Parmesan Roasted Brussels, Butternut Squash and Kale. I doubled the amount of brussels (approx 25-30) and used 2 bunches of kale (perhaps 8 c. chopped?). I also prepared the vegetables separately. To do this, I doubled the seasonings and then used roughly a third for each vegetable. The squash was tossed with seasonings and roasted for about 40 minutes without broiling. About 10 minutes before the squash was expected to finish, I sauteed the kale in a bit of oil briefly, added 1/4 c. of water, covered and steamed briefly - 4-5 minutes - check for burning and removed the lid to finish cooking, stirring through the seasoning and crisping up in the skillet. With the brussels I tried a similar method but wasn't at pleased. They could be roasted for about 20 minutes after tossing with seasoning (time with expected end time for squash) - this would be easiest. Or you could steam them for 3-5 minutes, roll them in seasoning and saute another 3-5 minutes just until tender. DO NOT OVERCOOK THEM.
We also cooked a favorite - kale mashed potatoes from epicurious!
Lastly for our dessert, I turned to the Grit for a coffee cream delight tart that was smooth, silky, a hint of coffee and a hint of chocolate. Perfect alongside a cup of strong coffee.
Sunday, September 30, 2012
Hot Cocoa Cookies

It's not quite the fall weather that really begs for cups of steaming cocoa to stave off the grey, cold nights just yet. I feel so grateful that almost every weekend in September has been sunny and gorgeous - allowing us to squeeze in a trip to Ambleside Park on the north shore, play some frisbee golf, cycle to church, stroll to the farmers market, and enjoy walks around the nearby lake.
However, we did host a games night and as always, I rummaged through my pantry to figure out what needed using up. As it turns out, the most pressing thing to get rid of was marshmallows. Marshmallows... what do you do with them other than s'mores and rice krispies treats? (I already crossed option 2 off the list since it meant buying rice krispies and ending up with leftover cereal) Rachael Ray had the perfect solution with her hot cocoa cookies. A warm chewy chocolate cookie with a perfectly browned marshmallow on top (assuming you don't burn it under the broiler) hiding a surprise square of melted chocolate underneath. Just delicious. They were a huge hit - if you want to go for a rocky road style, you
could use chocolate with almonds for the 7.5 oz in the recipe (i think
sea salt would be good too!) The one danger is overcooking the cookie while you're trying to get the marshmallows melted so I would suggest under-baking a bit more if you want to use the broiler method AND WATCH THEM LIKE A HAWK.

Hot Cocoa Cookies (Source: EveryDay with Rachael Ray Magazine)
makes 36-42 cookies
- 1 stick salted butter (1/2 c.)
- 6 oz bittersweet chocolate, chopped
- 6 oz semisweet chocolate, chopped (or 8 oz bitter sweet: 4 oz semisweet)
- 1 1/2 c. flour
- 1/4 c. unsweetened cocoa powder (I used dark cocoa powder)
- 1 1/2 tsp baking powder
- 1/4 tsp salt
- 1 1/4 c. light brown sugar (not packed)
- 3 eggs, room temperature
- 1 1/2 tsp vanilla extract
- 30 marshmallows, cut in half
- 7.5 oz dark chocolate bars (e.g. Lindt) cut into 1" squares
2. Whisk the flour, cocoa powder, baking powder, and salt together.
3. Beat the sugar, eggs, and vanilla with a mixer for 2 minutes on low speed. Then scrape in the melted chocolate and mix just until combined. Add half the flour mixture, mixing (or stirring) on low until just combined. Add the other half of the flour mixture, repeat. Cover the bowl and place in the refridgerator for 50-60 min.
4. Preheat the oven to 325 degrees F and use parchment paper to line two baking sheets. Use a cookie dough scooper (or some other device) to form 1" diameter balls. Roll them to acheive a round shape. Place about 2" apart on each cookie sheet and press them with the palm of your hand to flatten slightly. Bake about 10-12 minutes.
5. While they bake, stick the squares of marshmallows onto the cut side of the marshmallows.
6. Take the cookies out and press the chocolate side of the marshmallow into the cookie. Option 1: bake ~4 minutes just until the marshmallows are softened. Option 2: switch the oven quickly to broil and broil about 30 sec - 1 min - you should see the marshmallows beginning to puff and turn golden.
7. Remove from oven and let cool for 5 minutes before transferring to rack.
Tuesday, September 25, 2012
Pasties and Pottage!
How much more British sounding can you get? (okay tea and scones might win out ... ) Well once again I was at the mercy of a large bunch of organic celery and seeing that I paid an arm and a leg for it, figured I should use it all up before it went rotten. (now why did I buy it in the first place? Oh yes to make more of my sorrel lentil soup... but there was lots left over) So after perusing the pantry and fridge, I realized we had lots of onions, carrots and potatoes from the garden and well as kidney beans. I then spent a good hour or two flipping through cookbooks looking for - the one -. Found on page 106 of Sundays at Moosewood. Red Pottage, a hearty soup with a hint of borscht going on, but full of protein from the red kidney beans - kind of like the perfect "welcome to autumn" soup paired with cheese pasties (the british empanada?)

The red pottage on its own, served with a healthy dollop or two of greek yogurt was fantastic! And the dough on the cheese pasties... melt in your mouth. The good news is, although a lot of work, you can make the red pottage in one night, prep the veggies for the pasties and then make the pasties on the following night. There is enough pottage produced for about 10-12 lunch/dinners and 6 extremely large pasties that could be split in half with a bowl of soup. So it pays off when you have 4-5 days of not having to cook lunch or dinner :)
Red Pottage
1.5 - 2 c. dried kidney beans
7 c. water
1 medium beet, peeled and cubed (or a large beet)
--------------------------------
1 c. chopped onion
2 Tbs canola, olive, or vegetable oil
1 c. chopped (or diced) celery
(chard stems if you have them lying around 1-2 c.)
2 1/2 c. undrained canned tomatoes (you can used chopped or diced if need be)
1-2 Tbs lemon juice
1-2 Tbs Worcestershire sauce
1/8 tsp cayenne
salt and black pepper to taste
1. Bring the water and beans to a boil (if you soak the beans overnight first, let boil for 10 minutes vigorously), and then cover/simmer for 1.5 hours. Add the beet and let simmer another 30-40 minutes until beans and beets are both tender.
2. While the soup simmers, saute the onion and celery in oil until tender. Add the canned tomatoes, lemon juice, worcestershire sauce, cayenne, salt and pepper. Let simmer another 5-10 minutes and set aside.
3. Once the beans and beets are tender. Pour the onion/celery sauce into the pot and use an immersion blender to puree until chunky. Adjust salt and pepper, lemon, or cayenne to taste.
4. Serve with greek yogurt.
Cheese Pasties
Crust
3 c. unbleached white flour
1/2 - 3/4 tsp salt
1 c. salted butter
6 Tbs ice water (this was roughly how much I needed)
Filling
~ 1 c. diced celery stalks
~ 3/4 c. diced potato
1/2 c. chopped scallions or 2/3 c. chopped leek
1 1/3 c. diced carrots
4 c. grated cheddar cheese
1/4 tsp freshly ground black pepper
1/2 - 1 tsp dried thyme
1/8 tsp cayenne
4-6 dashes Worcestershire sauce
1. Sift flour and salt together. Cut in butter (or be lazy and pulse the mixture in your food processor until coarse meal texture is obtained). Drizzle ice water into the food processor while pulsing occasionally until dough begins to clump. You should be able to press it into a ball and not have it fall apart.
2. Divide the dough into two pieces, shape into balls, and wrap in plastic wrap. Chill for 15-25 min.
3. Mix together all the filling ingredients and preheat oven to 375 degrees F in the meanwhile.
4. Cut each ball of dough into three equal pieces. Roll out each piece into a 9" circle about 1/8 " thick. Quite easy if you roll it out on a piece of wax paper. Place 1/6 of the filling on half of the circle, leaving 1/2" clear edge. Fold the circle in half and fold the sealed edges back towards the pastry filling. Press the edges with the tines of a fork to seal (and make pretty). Cut three to four slits in the top of the pasty. Transfer to baking sheet.
5. Repeat for all dough. Bake 15 minutes at 375 then lower heat to 350 and bake 20 minutes. Dough should have a nice golden glow to it. Let pasties rest 5-10 minute before serving.
Sunday, September 16, 2012
Collards, Kidney Beans, & Zucchini Cornbread
Occasionally I use an actual cookbook for a recipe. I mean I have a whole swath of them towering above the kitchen table, but to actually pull one out and flip through it to find a recipe always seems so much more difficult than using google. But, after Moosewood's Beans & Greens recipe, I will be going back far more frequently! It's just an incredible dish that really makes the collards and beans shine together. Served with brown rice or cornbread knocks it out of the park for a southern style comfort meal. Although, somewhat oddly, the beans faintly remind me of the taste of refried pinto beans (bonus points for me).

Beans & Greens
1.5 c cooked kidney beans
** (if from scratch, use 1 c. uncooked kidney beans, soak overnight. Then bring to a boil in 1 c. water, 1 c. veggie broth, and 2-3 bay leaves. Simmer for 40-50 minutes until tender. Save broth if any is left. Remove bay leaves)
10 c. chopped, destemmed collard greens
1/2 large onion, chopped small
4-6 cloves garlic, sliced or minced
2- 4 Tbs cider vinegar
2 Tbs water
1/2- 1 tsp tabasco or other hot pepper sauce
salt/pepper to taste
1. Heat the oil in a large saucepan and add the onion. Saute for 5-8 minutes until turning translucent. Add the garlic for a minute. Then add greens, vinegar, water and tabasco and saute for another 5 minutes, stirring frequently. Cover and let cook 5 minutes.
2. Add 1 1/2 c. of kidney beans with 1/2 - 3/4 c of their cooking liquid, or use water. (if the beans are canned, use the liquid in the can). Cook covered for 10 minutes, until the collards are tender. Taste and adjust seasoning as needed.
Zucchini Cornbread (adapted from Epicurious)
1/2 c. butter (salted)
2 large eggs, lightly beaten
1/2 c. buttermilk (or kefir)
10-12 oz coarsely grated zucchini (about a medium sized zucchini)
1 c. all-purpose flour
1/2 c. whole wheat flour
3-4 Tbs sugar
1 tsp baking powder
1/2 tsp salt
1/2 tsp baking soda
3/4 c. cornmeal
1/2-3/4 tsp thyme
1/2 tsp chili powder (leave the above two spices out for the usual cornbread taste)
optional 1/2 c. raw or frozen corn kernels
1. Preheat oven to 350 degrees F. Grease 9x5 laof pan.
2. Melt butter. Let cool before whisking in eggs, buttermilk, and zucchini.
3. Sift flours, sugar, baking powder, baking soda and salt. Whisk in cornmeal. Fold in wet ingredients just until moistened.
Photo to come
Sorrel & Roasted Beet Salad
Sorrel is the new "wonder vegetable" of our garden. Well honestly, it has been since June when we transplanted it from a container into the ground and it exploded into a verdant mass of leaves. And we are grateful. Sorrel makes an incredible "green lettuce" base for a salad, particularly when the lemony bite of the leaves is paired with roasted beets, goat cheese, and pistachios. (I'm sure hazelnuts are equally delicious in this). I could also have added orange slivers or red onions but I was lazy and I can't say that I missed them one bit! My dressing was an olive oil/balsamic/dijon mustard/thyme mix with a touch of honey for sweetener. If I had frozen orange zest I would have added it to the dressing, but c'est la vie.
 Sorrel & Roasted Beet Salad

- Beets, red or golden. A large beet would serve two salads, or roast 3-4 to have extras for leftovers. Scrub clean and toss with a bit of olive oil. Wrap in two layers of foil and bake at 400 degrees F for 40-50 minutes until tender. (I did this part about 5 days in advance). Let cool and then peel the skin off. Slice into rounds and then into quarters (or halves depending on beet size).
- Sorrel, for two probably 100-200 grams, or for four 300-400g. Remove the stems, wash, and slice into ribbons.
- Goat cheese (as much as you want!)- for two, about 2 oz.
- Salted pistachios (1/4 - 1/3 c. for salad for two)
Wednesday, September 12, 2012
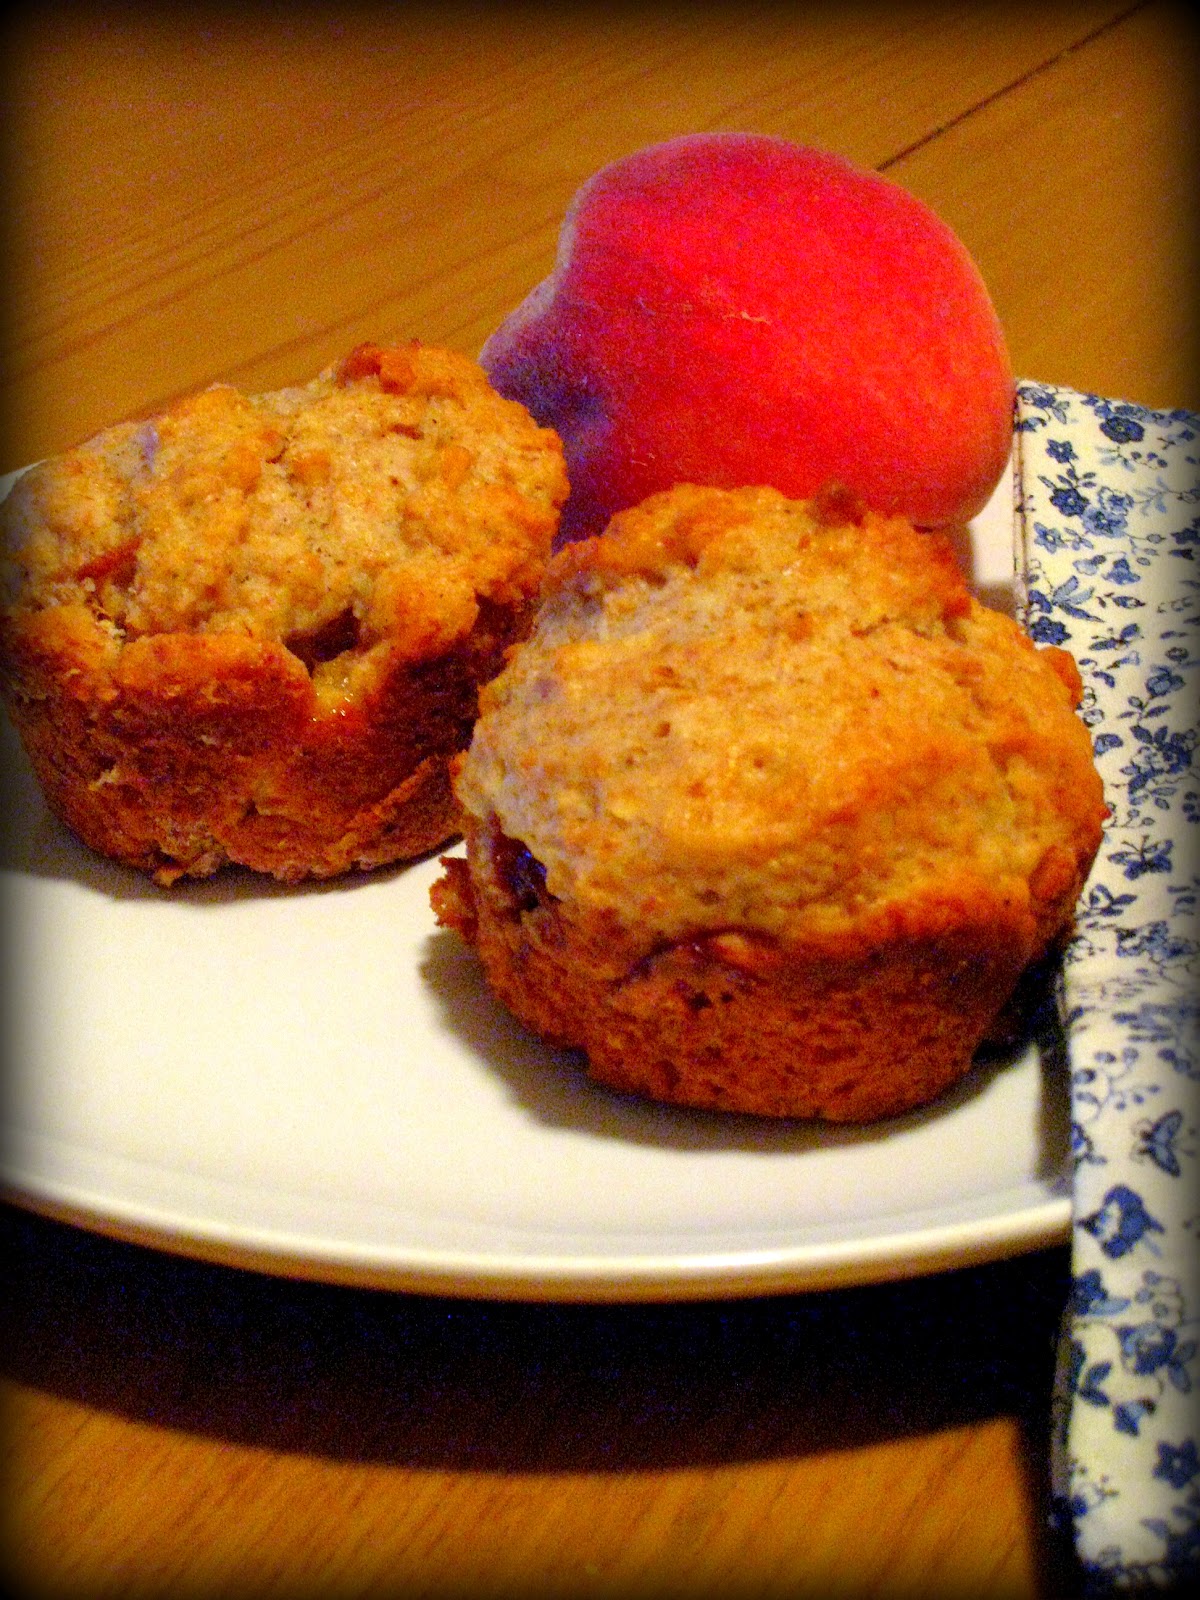
Peach Muffins
Do you find yourself with leftover juice from canned pears, peaches, etc and wonder if there is any use for it? Good news for you! It can be used in place of apple juice in muffin recipes. I don't remember why I bought a can of peaches as I am normally adverse to any store-bought canned fruit and its syrupy water, but I did and I finished all the peaches while the syrup sat in my fridge. This is one of those times of the year where I simply cannot afford to have spare things sitting in my fridge. So I pulled up this recipe for apple muffins and modified away! It was the perfect muffin consistency, not too sweet, and subtly peachy.

Peach Muffins
- 1 cup all-purpose flour
- 1 cup whole wheat flour
- 1/4 c. wheat bran or wheat germ
- 1/4 - 1/3 cup white sugar (I used 1/4 c. and it could have been just a touch sweeter)
- 3 teaspoons baking powder
- 1/2 teaspoon salt
- 3/4 cup peach syrup
- 1/3 cup vegetable oil
- 1 egg
- 1 1/2 teaspoons ground cinnamon
- 1/2 tsp freshly grated nutmeg
- possible some ground ginger?
- 1 cup fresh chopped peach or nectarine (or leave out and substitute 1/2 c. chopped walnuts)
- Heat oven to 400 degrees F. Grease muffin tin or line with baking cups.
- Whisk flours, sugar, baking powder, salt, and spices together. In a small bowl, whisk peach juice, oil, and egg. Add wet ingredients to dry; stir until dry ingredients are almost moistened, then stir in chopped fruit or walnuts.
- Fill muffin cups 2/3 full (I used a 1/4 c. filled to the top for each muffin cup and it worked perfectly) Bake for ~20 minutes. Let cool for 1- 2minutes before removing muffins from pan.
Sunday, September 09, 2012
Summer Retrospective
Just a few of my favorite summer photos from the month of August!


 |
| Oregon |


 |
| Georgia |


 |
| Vancouver Stanley Park Seawall++9898+6++ |

Friday, September 07, 2012
Welcome back September
Wow, the amount of posts for August was appalling! Guess it's a sign that I was far too busy enjoying a week with my parents in Oceanside, Oregon and the farm, along with 10 days of film festival, and another week spent in Georgia with my oldest bestest friends getting sunburned/bug-bitten, laughing, talking, drinking, eating, playing banangrams & taboo, swimming, entertaining a two year old, and doing my part to stock up on cholesteral laden goods characteristic to the South... eg. breakfast at Cracker Barrel with grits, fried eggs, and biscuits (only five though) & gravy, chicarrones, fried okra, fried green tomatoes, fried summer squash ... about the only thing I didn't eat for old times sake was moonpies! I was however incredibly fortunate to get a bag of end of season Georgia peaches and they were SPECTACULAR. If only I could have canned them all and brought them home. I had also forgotten how incredible night time in the south is - there is a veritable symphony of cicadas and tree frogs lasting all night and the slow sleepy dance of fireflies (though sadly they seemed far less in numbers than my childhood memories recall).
Now though, the garden is in full swing and we are laden with chard, collard greens, beets, potatoes, and carrots so I'm doing my best to come up with recipes that use a bunch of these.

This meal came together fairly easily (assuming that your greens are already washed and chopped), was colorful and the flavors all worked together so well. I found the Greens Adobo recipe in the Sundays at Moosewood Restaurant Cookbook and the sweet potato hash was inspired by this post. The Greens recipe is awesome and I think would work well both with Asian pairings and Southern pairings (as well as the intended Filipino pairings). Note that the spices were not measured per se for the sweet potato hash so I suggest seasoning, cooking, tasting and adjusting to suit your personal palatte.
Greens Adobo (from Moosewood), Sweet Potato Hash, & Fried Egg (serves 2)
Greens
- 5-6 cups chard, stems removed, and chopped
- garlic
- 3-4 large garlic cloves, sliced
- 2 Tbs soy sauce
- 1 Tbs white vinegar
- freshly ground black pepper to taste
- On medium heat, fry the garlic pieces in oil (grapeseed, canola, or olive) until golden brown in a large skillet (or wok).
- Remove the garlic and then add greens to skillet. Stir over medium high heat until wilted.
- Remove skillet from heat, and add seasoning & garlic pieces, stirring through. Serve almost immediately. I did cover mine for about 5-10 minutes and they tasted fine.
- 1 large sweet potato, peeled and grated (fine grater size rather than the large
- grater size for cheese or in food processor)
- 1-2 pinches garlic powder
- 1 pinch ground sage
- 1-3 dashes (mexican) chili powder
- freshly ground salt and pepper to taste
- Heat 2 Tbs of oil in a skillet over medium high heat. Add the sweet potato and the spices.
- Occasionally stir the sweet potato until the color changes from orange to a lighter yellow orange and the hash begins to brown on the underside.
- Taste to ensure seasoning is good and that the hash is cooked enough for your preference. Remove from skillet and fry up your two eggs!
Saturday, August 18, 2012
Birthdays and Cake
It's that time of year - the celebrating and remembering of a birthday, which always merits some reflection, some ridiculousness, and a good dash of hopeful planning for the future. As I took a day off from work to celebrate by myself, I was reminded how good it is to spend quality alone time with oneself, to recall exactly what it is one likes to do on one's own, reading a book, strolling through markets and galleries, enjoying the sights and sounds and smell of life (an in particular a fresh coconut donut and americano), and cycling in the summer sunshine by the ocean. All good things to be thankful for.

Turning 31 in many ways is so much better than turning 30; there's a lot of hype and hoopla around 30 to live up to, an expectation of extravagant celebration, whereas 31- there are no preconceived notions of what a celebration might look like. Celebrating alone is not out of the question (though who is truly alone these days with Facebook...) I think 31 will be a very good year. And really, this is the year I take that sword fighting class I've been thinking about for so long.
Cake! What's a birthday without a dessert? To keep going with the changing it up theme for 31 I actually baked myself a birthday dessert WITHOUT chocolate. Shocking, I know. I had peaches on my mind though (could be my impending trip to Georgia) - something not too heavy, sweet, delicate, and requiring fairly minimal effort (it was my birthday after all). Bill Granger's peach, almond, and yogurt cake was the perfect match (found on a defunct but excellent blog called Almost Bourdain) and I would happily bake it again. Maybe next time I will try to ensure there are more people around so I don't end up eating 60% of my own cake? Maybe... :) Warning: this cake takes an hour and a half to bake once it's assembled and then you have to let it cool, so make sure you don't start baking it at 9pm unless you're a night owl!
Peach, Almond, Yogurt Cake
220 g (7 3/4 oz) salted butter, softened (almost 2 sticks)
250 g (9 oz) sugar
1 tsp natural vanilla extract (I would try replacing this with almond extract or use 1/2 tsp almond & 1/2 tsp vanilla)
3 eggs
2 1/2 cups all purpose flour
5 tsp baking powder
50 ml (1 3/4 fl oz) milk
1 cup yoghurt
450 g (1 lb) small peaches, chopped [USE FRESH OR FROZEN, NOT CANNED]
50 g (1 3/4 oz) flaked almonds
Alternate topping: handful of whole almonds (1/2 cup?) and citrus zest (1/2- 1 tsp) pulsed in the food processor to a fine crumb. Sprinkle over cake and bake. I loved this version, though it is messier.
1. Preheat oven to 325 degrees F. Grease a 9" spring form pan all over and then line the bottom with parchment paper.
2. Cream the butter and sugar in a mixer on high speed for ~5 minutes until light and fluffy. While the mixer is going, sift the flour and baking powder together and set aside. Add vanilla (or almond extract) and eggs one at a time to the butter-sugar mixture, beating well after each.
3. Add half of the flour, half of the yogurt, and all the milk to the batter. Mix at low speed 30 sec - 1 min, scraping the sides. Then add remaining flour and yogurt and mix at low speed until combined (30 sec - 1 min).
4. Gently fold through the chopped peaches and pour the batter into the the springform pan. Sprinkle with almonds (or almond crumb). Bake for 1.5 hours.
5. Let cool for 15-20 minutes before removing the ring of the springform pan.
*photo to come.
Friday, August 17, 2012
Ginger Ale Bread
What's that? Ginger ale bread?? You can put soda in bread?!?!?!! Indeed, that was the very same reaction I had, but as you know (or may not know) when you have 12 oz of stale ginger ale sitting in your refrigerator for more than 2 weeks, desperate times call for desperate measures. I did honestly consider just pouring it down the drain for about 5 minutes, but then the spendthrift in me won out and onto the internet I went, googling "ginger ale bread". Lo and behold, I am not the only crazy person to believe in this combination. As luck would have it, a recipe very similar to my favorite beer bread recipe appeared on Window on the Prairie's blog.

With a few modifications, the loaf emerged, shockingly risen despite the flatness of the soda, and so white when it came out of the oven that wife remarked, "what's wrong with it?" (maybe this was the warning sign of under-baking!) The subtle smell of ginger ale wafting up from the still steaming loaf was appealingly intoxicating. Upon slicing into the loaf, it was sadly revealed that it was under-baked. So I can't really speak to how good the texture would be if it were correctly baked. Taste-wise, it's not the most exciting of flavors and I would definitely add something else like more ginger or nutmeg or citrus zest. But I can see why it would be a nice pairing with fruit jams or berry compotes. Oh well, it was an experiment and it got the ginger ale out of my fridge.
Ginger Ale Bread
2. Sift flour, sugar, salt, baking powder, and spices together.
3. Pour ginger ale into dry ingredients and mix through with as few strokes as possible.
4. Transfer batter to greased 9x5" loaf pan and bake for ~40 minutes until golden brown and cooked through.
5. Let cool on wire rack for 10-15 minutes before removing from pan.

With a few modifications, the loaf emerged, shockingly risen despite the flatness of the soda, and so white when it came out of the oven that wife remarked, "what's wrong with it?" (maybe this was the warning sign of under-baking!) The subtle smell of ginger ale wafting up from the still steaming loaf was appealingly intoxicating. Upon slicing into the loaf, it was sadly revealed that it was under-baked. So I can't really speak to how good the texture would be if it were correctly baked. Taste-wise, it's not the most exciting of flavors and I would definitely add something else like more ginger or nutmeg or citrus zest. But I can see why it would be a nice pairing with fruit jams or berry compotes. Oh well, it was an experiment and it got the ginger ale out of my fridge.
Ginger Ale Bread
- 3 cups all purpose flour
- 2-3 tablespoons sugar
- 1/4 - 1/2 tsp salt
- 1- 2 tsp grated fresh ginger
- 1 tablespoon baking powder
- 12 oz can of ginger ale, at room temperature
2. Sift flour, sugar, salt, baking powder, and spices together.
3. Pour ginger ale into dry ingredients and mix through with as few strokes as possible.
4. Transfer batter to greased 9x5" loaf pan and bake for ~40 minutes until golden brown and cooked through.
5. Let cool on wire rack for 10-15 minutes before removing from pan.
Thursday, August 02, 2012
The Ugliest/Yummiest Thing We've Cooked
Despite my fervid reading of a fantastic blog post on how to make ugly food look good for blog photos, I was unsuccessful with this item, but I swear it tastes DELICIOUS. If you like Indian food, kale, and/or crispy potatoes, please make this dish and your tastebuds will be thanking you for weeks. Another added benefit to this dish - it only gets better as leftovers and that curry flavor permeates everything in a beautiful rounded medley of spice. Wife also suggests that a wonderful variation on this dish would be to replace the potatoes with sweet potatoes. I am already signed up for that version. Also consider crumbling some paneer into the kale mixture.

Curried Potato Kale Galette (adapted from Canadian Living Magazine, March 2008)
1 Tbs canola oil
1 onion, finely diced (medium or large)
4 cloves garlic, minced
1- 1.5 Tbs minced ginger (fresh)
2 tsp ground cumin
2 tsp garam masala
1 tsp tumeric
1/2 tsp salt
1/8 tsp cayenne
8 c. chopped kale, stems removed (give or take, I used 2 bunches organic)
4 potatoes, thin slices - use a mandoline (what kind did the original recipe intend? no idea, but we used about 7-8 small red potatoes from our garden, or roughly 3-4 cups once they are sliced)
1/4 c. butter melted
*optional, small cubes of paneer stirred into the kale/onion mixture
1. This requires a cast iron skillet or casserole dish.
2. Saute the onion in the oil over medium high heat for about 6 minutes until starting to soften. Add garlic, ginger, and spices. Continue cooking until onion is soft.
3. Add kale into the pan, about 2 c. at a time until wilted enough to fit more kale. If it seems the vegetables are starting to burn, add about 1/8 c. water a bit at a time to keep them moist. Continue until all the kale is in and wilted.
4. Remove kale/onion mixture from pan. Wipe cast iron skillet out if using, and then lightly grease again with oil.
5. Peel potatoes if using russet potatoes. For yukon gold or red, peel can stay on. Use a mandoline or sharp knife to cut the potatoes into paper thin slices.
6. Layer 1/3 of the potatoes into the bottom of the pan (or casserole), then 1/2 of the kale mixture, 1/3 of the potatoes, 1/2 of the kale mixture, and finishing with potatoes. Pour the melted butter evenly over the top of the casserole.
7. Place in 425 degree F oven and bake for 40-50 minutes until cooked through.
8. Let cool for 15-20 minutes before cutting.
Subscribe to:
Comments (Atom)