Tuesday, November 29, 2011

Dumplings!

I have been wanting to cook my own dumplings for awhile. However, with the Christmas season hustle & bustle increasing exponentially by the day, I decided not to bother with making the dumpling dough from scratch (though it's still on my to do list to try). I looked at quite a few recipes trying to find a vegetarian filling that I thought would be tasty and determine whether a pre-cooked filling is preferable. I ended up creating a blend of a couple different recipes and have definitely sided with the pre-cooked filling camp! These take a while to do so a dumpling day with a friend would be far more fun. I think my filling might make about 100-125 dumplings, so you could also cut this recipe in half if you just want enough for a single meal. Or use the extra filling as a taco filling or over steamed rice.
Filling

Raw Dumplings
Beautifully fried/steamed dumplings with sauce
Vegetarian Dumplings
1 1/2 c. finely grated cabbage
1 1/2 c. finely grated carrot
5 green onions, finely chopped
6-8 cloves garlic, minced
1 can water chestnuts, diced
2-3 Tbs minced ginger
sesame oil
soy sauce
rice vinegar
fish sauce (or oyster sauce)
1/2 c. cilantro, finely chopped
dumpling wrappers (100?)
**Optional - can replace some of the veggies with crumbled, marinated tofu

1. Heat 2-3 Tbs sesame oil (or canola oil) in a deep skillet and add ginger and garlic. Saute until fragrant.
2. Add cabbage, carrot, green onions, and water chestnuts. Saute on medium heat for 3-5 minutes until veggies have wilted just a bit. While they cook, drizzle on a bit of soy sauce, rice vinegar, and fish sauce to taste. I probably did one to two circles of the pan with soy sauce and rice vinegar and a couple of dashes of fish sauce. The filling should taste good on its own before it goes in the dumpling. There should be almost no liquid in the pan when you're done cooking.
3. Remove filling from heat and stir in cilantro.
4. Open the dumpling wrappers and keep covered with a damp cloth. Work on one to two wrappers at a time. Place a rounded 1/2 tsp of filling in the centre of the wrapper. Use a finger or brush to moisten along half of the edge of the dumpling. Fold and crimp the edges so it is sealed.
5. Lay out dumplings on parchment paper. If you're going to cook them soon, keep covered with damp cloth. If not, fill a pan and then put in the freezer to freeze. Once the dumplings are completely frozen, put them in a ziplock bag and store for later!
6. To cook. Heat canola oil in a deep skillet with lid. Put 10-12 dumplings in the pan and let cook until browned and a bit crispy on one side. Pour in 1/4 c. water (don't get splattered!) and quickly cover with lid. Let steam 2-3 minutes until cooked.
7. Serve with dipping sauce!

Thursday, November 24, 2011

Cooking Doldrums

Honestly, I'm starting to get more than a bit disheartened with my last couple of weeks of cooking. If I believed in jinxes, I would say I was jinxed. I got the flu shot for the first time ever and promptly got a 2 week long cold.

I remade the pumpkin bread recipe that I raved about - half of the bread was perfectly cooked, the other half, when we finally got to it, was a mess of uncooked raw dough. After 65 minutes of baking!!! Utterly baffled. So sure that I mixed everything thoroughly before pouring it into the loaf pan.

I made pie dough - pie dough, something I usually do quite competently. This time instead of using all butter, I actually followed joy of cooking's recipe and used appropriate amounts of shortening and butter instead. I could not get the pie crust off the counter without it tearing into a hundred pieces. The top of my pie looks like I took a bunch of pie dough scraps and flung them haphazardly over the surface - which is basically the only thing I could do.

Not even cooking related, I tried to make one of my friend's a baby shower present. Yep it also got ruined.

I am getting to the point where I am afeared of baking. I hate to put in the time and effort and love, not to mention the cost of ingredients, and come out with something disappointing or inedible.

Is there any glass half full optimism to this situation?
I finally tried the new york times gluten-free pumpkin dumplings recipe and have to say, pairing them with a coconut milk/masala was pretty darn genius. But I think the recipe could be improved a bit by actually cooking the dumplings in a soup/stew/masala rather than in boiling salted water. And/or adding cumin/coriander to the dumpling dough itself. The recipe did let me use up a large delicata-type squash rather than using canned pumpkin. So I suppose that's a small plus?

Got it from http://villabloggera.com/tag/blah/

Sunday, November 20, 2011

Peach Cobbler

The peach cobbler recipe that never fails: Thank you Allrecipes.com! Truly, this cobbler is a joy to my little transplanted Southern heart, not only because it involves peaches (my very favorite fruit), but particularly because of the crust. In this recipe, the batter rises up through the peaches and a ridiculous amount of melted butter to produce an amazingly sweet crunchy edge where it browns and a moist chewy layer of dough underneath. Fantastic when served hot with whipped cream or ice cream and equally delicious when eating by the large spoonful from the pan the next morning for breakfast :)

Peach Cobbler
1/2 c. butter, in a 9 x 13 pan, melted
1 29 oz can sliced peaches (don't use the liquid) (or an equivalent amount of fresh sliced peaches/thawed frozen peaches)
1/2 tsp ground cinnamon
1/4 tsp ground nutmeg
1 Tbs flour
1 c. white sugar
1 c. all-purpose flour
2 tsp baking powder
1 small pinch salt
1/2 tsp cinnamon
1/4 tsp ground nutmeg
1 c. milk 

1. Preheat oven to 350 degrees F. You can put the 9x13 pan with the 1/2 c. butter in the oven to melt as the oven heats.
2. Combine the peaches, 1/2 tsp cinnamon, 1/4 tsp ground nutmeg, and 1 Tbs flour in a large bowl. Stir and set aside.
3. Combine sugar, flour, baking powder, 1/2 tsp cinnamon, 1/4 tsp nutmeg and pinch of salt. Whisk milk into dry ingredients until smooth.
4. Pour batter over melted butter in the 9x13 pan. Spoon peach mixture evenly over batter.
5. Bake for ~ 1 hour, edges should be nicely browned, and the centre should be mostly firm to the touch. Let cool for 5-10 minutes before serving.


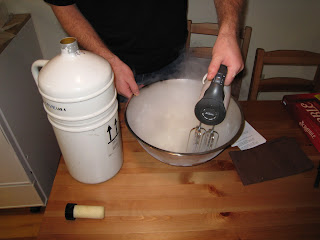
Gratuitous Liquid Nitrogen Photos of Making Buttermilk
Ice Cream (sorry no recipe - M. made it up on the spot)

Exciting, no?


Posted by Picasa

Pumpkin Fail! Pumpkin Granola Bars & Pumpkin Frozen Yogurt

I was so excited about this recipe, really really excited. What could be a better fall snack than a pumpkin chocolate chip granola bar? The photos were so pretty, with the shiny blue ribbon and parchment paper packaging, but honestly, I can't for the life of me figure out how this recipe is getting such high circulation on the internet. In retrospect, my common sense alarm should have gone off in a recipe that asked for 3 1/2 c. rolled oats and only 1 c. of liquid -- how are those oats going to cook? The answer is - they're not. Okay and I confess I didn't follow the recipe perfectly - I took out 1/4 c. of brown sugar and I added an egg, but really I don't think that's the reason why these bars are incredibly incredibly chewy. Not like a chewy granola bar chewy but like chewy as in a cow ruminating on cud chewy. As in the only thing I can do with them is try to crumble them up and pour milk over them and pretend I'm eating an oatmeal/cereal hybrid.

And then there was this recipe: Pumpkin Frozen Yogurt - sounds tasty - like frozen pumpkin cheesecake but healthier right? Lesson: Don't be deceived by photos that like some kind of siren calling lure you in promising untold delights only to crash your cooking ship upon the rocks of a grainy/unscoopable/unpalatable dish. Who knows, maybe with vanilla yogurt as opposed to kefir yogurt, it might work, but I doubt the texture would be that different....

*SIGH* Tomorrow is another day right?

Thursday, November 17, 2011

More Fall Photos!

Remembrance Day - Walk Around Stanley Park Seawall


Cute Molly Photos! She is obsessed with the rug in front of our sink...

There is lots of rolling...

And grooming... usually followed by more rolling..
Posted by Picasa 

Wednesday, November 16, 2011

Pumpkin Extravaganza Continues... Pumpkin Bread!

So I recently did a pumpkin loaf bake-off (competing against myself of course!) to see which of two pumpkin loaf recipes came out on top: the Epicurious recipe for Pumpkin-Walnut Bread versus the food.com recipe for Pumpkin Bread. Now it may well be due to under-baking the Epicurious recipe that it was not my favorite of the two, but I wasn't all that happy with the flavor either. I liked the less cloyingly sweet flavor of the second recipe. When I baked the food.com recipe the first time, I did not have any applesauce on hand so I used 1/2 c. oil in total, and instead of water, I used the whey from kefir cheese! It does produce a smaller loaf (8x4" as opposed to a 9x5"). 

I recently baked this loaf again with a few more variations. I used 1/4 c. homemade applesauce (which had no added sugar), and reduced the sugar in the recipe to 1/2 c. + 2Tbs. I was also a bit lazy and tried substituting 1 1/2 tsp pumpkin pie spices for the spices listed in the recipe below, but I think it is indeed better with the spice amounts shown below. This produces a moist loaf - not sweet at all. If you want a sweet loaf, use 3/4 c. sugar with the applesauce. If you use apple juice instead of water, and decide to add raisins, the bread will be even sweeter still.

Pumpkin Bread
3/4 c. sugar (or reduce to 1/2 c. + 2 Tbs)
1/4 c. oil
1/4 c. applesauce
2 eggs
3/4 tsp cinnamon
1/2 tsp cloves
1/2 tsp ginger
1/2 tsp all spice
1/2-1 tsp vanilla
1 c. pure pumpkin
1 tsp baking soda
3/4 tsp salt
1 1/2 c. + 3 Tbs flour
1/3 c. water, kefir whey, or apple juice
3/4 c. chopped walnuts (optional)
3/4 c. raisins (optional)

1. Preheat oven to 350 degrees F and grease an 8 x 4 loaf pan.
2. Whisk sugar, oil and applesauce together. Beat in eggs. Whisk pumpkin, spices, vanilla and water (or juice) in.
3. Sift flour, baking soda and salt into a large bowl.
4.  Stir wet ingredients into dry ingredients until all the dough is moistened. Fold in nuts and raisins.
5. Pour into loaf pan and bake for 70-80 minutes until done.
6. Cool on a rack.

Thursday, November 10, 2011

Another quick bread


I came across this recipe when I was looking for an easy bread to cook in a limited amount of time (i.e. when you don't have the time to let things rise with yeast). Most quick breads I'm familiar with are either tea breads (pumpkin bread, banana bread, etc.), brown breads (think molasses and Boston), or cornbread - but rarely something I would happily use for a sandwich loaf - until now! Not only that, I also found that I could use up kefir yogurt in place of the buttermilk! Two birds, one stone. It was a good day.

Quick Wheat Bread
2 c. bread flour
2 c. whole wheat flour (I have also tried using 1 c. whole wheat & 1 c. spelt)
1 tsp baking powder
1 pinch salt
1 egg
1 3/4 c. buttermilk (I used 1 1/2 c. kefir yogurt + milk and 2 Tbs vinegar up to the total amount - you can use any combo of yogurt+ milk or just buttermilk)
2 Tbs melted butter, slightly cooled
Optional: Sesame seeds and/or sunflower seeds (herbs might be nice too)

1. Sift dry ingredients together
2. Beat egg in a small bowl, then beat in buttermilk and butter.
3. Fold wet into dry ingredients, adding seeds in.
4. Butter and flour an 8 x 4" pan (this is essential to getting a tall loaf!) and pour batter into pan.
5. Bake at 400 degrees F for ~50 minutes. Bread should sound hollow when tapped on the top.
6. Cool on a rack and then store in a ziplock bag for freshness.

Pumpkin Extravaganza Continues... Pumpkin Scones!

I had so much leftover maple cream cheese frosting from the pumpkin whoopie pies that I decided pumpkin scones were in order. So many recipes to choose from on the internet! Fortunately, Joy of Baking did not disappoint me. I made a couple of alterations to the recipe (surprised? no...) Instead of raisins and pecans, I used crystallized ginger and snuck some kefir yogurt into the recipe in place of the buttermilk. I also upped some of the spices and decreased the vanilla. They were perfect, both with and without frosting.
PUMPKIN SCONES
2 c all purpose flour

1/3 c packed light or dark brown sugar
3/4 tsp ground ginger
1 tsp ground cinnamon
1/2 tsp all spice
1 tsp baking powder
1/2 tsp baking soda
1/2 c cold butter, cut into pieces
1/4 c finely chopped candied ginger
1/2 c buttermilk (or kefir yogurt - if using yogurt, stir in 2-3 Tbs of milk)
1/2 c canned pure pumpkin
1/2 tsp vanilla 

For frosting, see pumpkin whoopie pie post.

1.  Preheat oven to 400 degrees F.
2. Sift dry ingredients together in a large bowl (except for ginger).
3. Cut butter into flour mixture using pastry cutter, knives, or forks, until the mixture resembles crumbs.
4. Stir in the ginger.
5. Whisk the buttermilk, pumpkin and vanilla together in a small bowl.
6. Fold wet into dry ingredients in as few strokes as possible (but it should be well-mixed).
7. On a floured surface, knead dough gently 5-6 times. Pat into a circle about 12 inches in diameter and cut into 8 wedges. Place wedges on baking sheet and bake for ~20 minutes.

Wednesday, November 09, 2011

Quinoa Cakes - Redux


Being that a) the first time we made quinoa cakes they were awesome and b) despite scaling back the recipe for the cooked quinoa, we still had copious amounts leftover, it was time to attempt the recipe again. Unfortunately (or rather fortunately) this time we were out of parsley so we decided to go with a latin theme!  The raw onion and garlic was so much tastier in the cake, the cilantro was fabulous, we used lemon zest and lemon juice --  although next time I would go for lime in the latin flavored version. These are rough estimates of what we put in .... they could definitely have used a third egg for binder so I'm suggesting 3 in the recipe although we only had 2 at the time. Topped with salsa verde and kefir cheese (or sour cream), these were DELICIOUS! Sadly, no leftovers for tomorrow :(

Cilantro Lemon Quinoa Cakes
2 c. cooked quinoa (if you have 3, even better!)
1 medium onion, finely chopped
3-4 cloves garlic, minced
1/3- 1/2 c. finely chopped cilantro
1/3 c. chopped green olives (black olives might work nicely too!)
1/2 c. parmesan
1 c. panko
3 eggs, beaten  (if you use 3 c. cooked quinoa, maybe use 4 eggs)
3-4 Tbs lime juice (or lemon juice) + zest of one lime (or lemon)
2-4 Tbs nutritional yeast
salt/pepper

1. Stir everything together in a bowl.
2. Form into patties.
3. Fry patties until golden brown on each side in good quantity of oil in a hot skillet (cast-iron is great!).
5. Top with yummy condiments!

Tuesday, November 08, 2011

Swiss Chard and Sweet Potato Gratin

I was so excited to make this dish since we have a not insignificant quantity of chard to finish off from our garden. But making this dish by smittenkitchen made me realize I have absolutely no concept of how much chard it takes to reach 3 lbs worth of greens! At the final count, I ended up with about 2.5 lbs of greens (according to our cheap Ikea scale...) which included chard, spinach, and kale - in addition to some small broccoli florets (why not?).

I ended up cooking the greens and onion about 5 days in advance, whoops! talk about a delay in cooking, but they were no worse for wear when I finally assembled the casserole. Note: owning a mandolin makes slicing 2 lbs worth of 1/8" thick slices of sweet potato fairly easy. I also assembled the casserole in the morning and took it out of the fridge an hour before I planned to start baking it. The dish was in the oven when I turned it on to preheat. These strategies will prevent breaking a glass baking dish. If you have a metal baking pan, no worries.

The bechemel sauce for this dish smells so incredible I was in danger of eating it all before putting any in the casserole. Fortunately I held off, believing that the bechemel in combination with the sweet potatoes, chard, grated gruyere and herbs would be worth the wait. Oh the smell of this casserole filling the house - mouthwatering, stretching patience to the limits! The finished casserole more than surpassed the anticipation and expectation in every deliciously rich bite. I did find the sweet potato flavor very sweet - partly because the recipe has no instructions on how much salt is needed. If I made the dish again, I would try half potato/half sweet potato to tone the sweetness down.

Sweet Potato-Chard Casserole
1/4 cup butter
1 medium onion, finely chopped
3lbs chard (or a combination of kale/chard/spinach), leaves and stems separated, cut into 1" pieces **if you use kale, don't use the stems at all!**
1/4-1/2 tsp of freshly grated nutmeg
1 c. whipping cream 

1 c. evaporated milk
4-6 garlic cloves, minced

2 Tbs. butter
2 Tbs. flour
2 lbs sweet potatoes (orange ones), peeled and cut into 1/8" thick slices
1/4 c. minced fresh Italian parsley

1 Tbs + 1 tsp thyme
Fine sea salt
Freshly ground black pepper
1 1/4 c. (about 6 ounces) coarsely grated Gruyére chees
e

1. Melt 1/4 c. butter in a large skillet or heavy pot. Add onion, saute over medium low heat until softened. Add kale leaves (if using) and saute for 10-15 minutes until softened. Add chard stems, nutmeg, salt and pepper, keep sauteing, until veggies are tender. Add chard leaves (and spinach, if using) by large handfuls, stir, cover, and let greens wilt (occasionally stirring as needed - you can also add a bit of water if things are sticking to the bottom).
2. Once the greens are wilted, transfer to a colander to drain and press out liquid using a large spoon. (I saved the liquid to add to stock for soups - it's tasty!). Set the chard aside to cool. You can add more salt and pepper to taste as needed.
3. If you haven't already, slice up the sweet potatoes. Submerging them in water will keep them from browning, but they need to be dried before putting in the casserole dish. (Press them with paper towels to dry them). Also, grate the cheese and set aside. Mince the parsley and set aside.
4. Bring cream, evap milk, and garlic to a simmer in small saucepan. Keep covered and set aside.
5. Melt 2 Tbs butter in a medium heavy saucepan over moderate heat and stir in flour. Cook roux, whisking, until mixture gently bubbles/boils. Keep whisking - roux should start to smell cooked and brown ever so lightly (~1-3minutes). Slowly whisk in cream mixture and bring to a boil, continuously whisking, one minute. Add salt and pepper.
6. If you're going to bake the gratin straight away, preheat oven to 400 degrees F. If not, start assembling the gratin: Butter a deep 9×13 baking dish (my pyrex one worked fine). Spread half of the sweet potatoes over the bottom of the dish. Sprinkle with salt, pepper, some parsley/thyme, and a 1/4 c. of Gruyere. Layer half of the chard mixture next, then salt, pepper, parsley/thyme, and 1/4 c. of Gruyere. Pour half of bechamel sauce over the first two layers. Repeat with rest of sweet potatoes, s/p/herbs/cheese, chard, s/p/herbs, rest of the bechemel sauce, then last 1/4 c. of cheese. Try and press everything down into the pan so that the veggies are submerged in sauce. Don't worry if it doesn't look like enough sauce (mine didn't) and it bubbled up just fine/staying quite moist
7. Bake gratin for about 1 hour until golden and bubbly, and most of the liquid is absorbed. Let stand 10 minutes before serving.(I baked mine for about 1.5 hours since it had been in the fridge, the first hour with foil on top, and the last 30 minutes uncovered).

Fall Colors


Posted by Picasa

Monday, November 07, 2011

Pumpkin Whoopie Pies

I feel absolutely ridiculous writing the phrase "whoopie pies". Who came up with the term? Despite its ignoble name, the photos of these soft cookie/frosting filled sandwiches looked so deliciously whimsical and fun, not to mention being perfectly fall-themed with pumpkin/maple syrup flavors, that I couldn't resist trying them out.  They turned out pretty darn cute looking, but I have to say, the taste? It's good, but I don't know that it merits all the effort to create the sandwich cookie. I'm almost certain it would just as good (and easier) as a mini cupcake with frosting.
I cut browneyedbaker's recipe [except for the spices] in half (my quantities shown below) and produced 14 large whoopie pies (I actually used my cookie scooper for these). I would suggest that a 2" ball of dough is just too big.

Pumpkin Cookie Base:
1.5 c all-purpose flour
1 Tbs + 1 tsp cinnamon
1 tsp ground ginger
1/2 tsp ground nutmeg
1/2 tsp ground cloves
1/2 tsp baking powder
1/2 tsp baking soda
1/2 tsp salt
1/2 c. sugar
1/2 c.dark brown sugar (I only gently packed mine)
1/2 c. canola oil
1.5 c. cups chilled pumpkin puree
1 egg
1 tsp vanilla extract

Maple-Cream Cheese Frosting:
1.5 - 2 c. powdered sugar
4 oz cream cheese, room temperature (half of a regular sized block)
14 c. butter, room temperature
4-5 tablespoons maple syrup (if you have maple extract, add some of that in)
1/2 tsp vanilla extract

1. Line baking sheets with parchment paper and preheat oven to 350 degrees F. (I was actually able to reuse the parchment paper from this recipe for another baking item - almost no cookie residue on it!)
2. Whisk together all the ingredients from flour through salt. Set aside.
3. In a separate bowl, whisk the sugars and oil together. Add in the pumpkin puree, eggs, and vanilla, whisking to combine completely.
4.Add half the flour mixture to the pumpkin mixture and stir until mostly combined, then add the other half of the flour mixture, stirring to combine completely.
5. Drop dough by the heaping tablespoon-full onto the baking sheets, leaving 1" or so between the dough mounds (yes they should be rounded and look dome shaped).
6. Bake for 10 to 12 minutes. The cookies should be firm to the touch and pass the toothpick done-ness test. Remove from the oven and let the cookies cool completely on a cooling rack.
7. To make the filling, beat the butter on medium speed until smooth. Add the cream cheese and beat until smooth. Add half of the powdered sugar, combine, then beat the maple syrup and vanilla in. Continue to beat in the rest of the powdered sugar. Taste for flavor. If good, place in the fridge to firm up.
8. Once the frosting is firmer (right before you want to serve them), you can spread it on a cookie and place another cookie on top. Voila!

Friday, November 04, 2011

Lemon, Olive, and Parsley Quinoa Cakes - Item #6

Well my to do list attack plan has been haphazard to say the least. I checked off the Moroccan spiced spaghetti squash and made plans to take on the chard-sweet potato gratin next. Despite the fact that I precooked the chard/butter/onion component 5 days ago, I have yet to assemble the rest of the gratin. *shrugs* I did already make a second batch of the almond butter banana granola bars though - and replacing the 1/4 c. of raisins with 1/3 c. unsweetened coconut plus baking it in an 11x7 pan (the bar mixture only spread over 3/4 of the pan) was the perfect adjustment to the sweetness level and bar thickness!

In the meantime I got distracted by Item #6's recipe from Joy the Baker. My first impression upon taking a bite of these cakes (as a vegetarian) was OMG this is the most wonderful texture ever!  Topped with ketchup, it's like the best non-seafood cake in existence (but still full of protein!). Crispy on the outside, chewy on the inside, with the green olives' brined flavor providing a nice undertone to the saltiness.


My only disappointment was the lack of lemon and parsley flavor. I expected the brightness of the parsley and citrus tartness/acid to really stand out and it just didn't live up to it. When I make these again (is tomorrow too soon??), I will increase the parsley to 1/2 c. and add 1-2 Tbs lemon juice in addition to the zest. Also, I did sauté the onion and garlic briefly before stirring into the batter as I've had previous traumatic experiences of bites of raw onion in fried patties  --  but in retrospect I'm wondering if that may have contributed to the lack of punchy flavor? So next time, I'll try adding those ingredients in raw. The quiona batter was actually quite moist and I ended up adding an extra 4 Tbs of spelt flour + a couple Tbs of panko rather than having to add in any liquid to get the batter to stick together.

Lemon, Olive, and Parsley Quinoa Cakes
1 cup raw quinoa
2 cups water
1/4 teaspoon salt
4 large eggs, beaten
1 medium yellow onion, diced
4 cloves garlic, diced
1/2 cup grated parmesan
1/3 cup coarsely chopped green olives
1/3 cup chopped parsley
1 tablespoon lemon zest
1 cup panko bread crumbs
1/2 teaspoon salt
1/2 teaspoon coarsely ground black pepper (or heaping 1/4 tsp of powdered ground black pepper)

1. In a medium saucepan, bring quinoa, water, and 1/4 tsp salt to a boil. Reduce heat and let simmer, covered, for ~20-24 minutes until quinoa is cooked.  Remove from heat and transfer to a metal bowl to let cool (can put in fridge to speed this along).
2. In a large bowl, combine all ingredients from the onion through black pepper and add the cooled quinoa in.  Stir thoroughly.

3. Whisk the eggs together and then stir into the large bowl of ingredients. The mixture should be fairly moist, but if needed you can add a bit of water or flour/more panko. If you're not sure of the consistency, you can do a "test cake" and see if ti holds up!
4. Shape quinoa mixture into patties (dipping your fingers in cool water will help). We got 14 patties that were about 3 inches in diameter.
5. In a frying pan, heat 2-4 Tbs olive oil (I probably used closer to 4-5Tbs olive oil in a cast iron skillet). On medium heat, fry the quinoa patties until nicely browned on each side. Set on paper towel to cool.