Tuesday, May 22, 2012

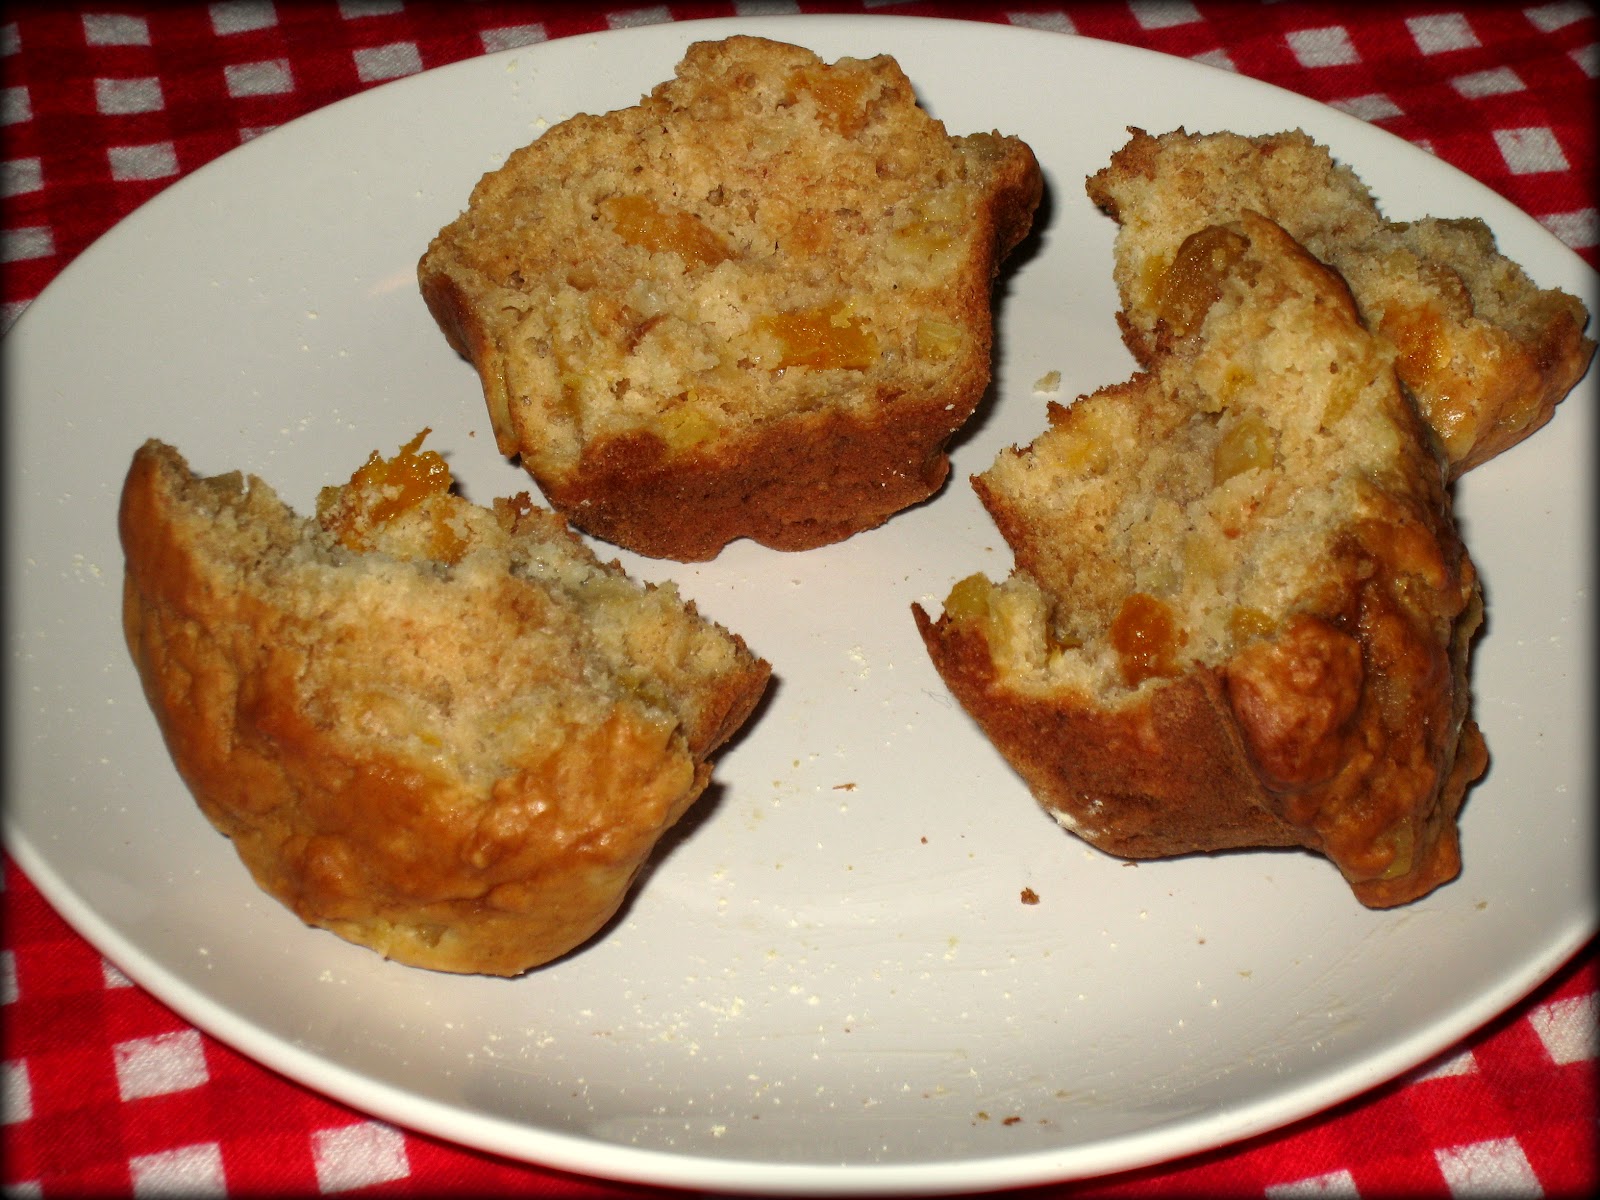
Apricot Ginger Muffins

I baked these muffins to dispose of the last the dried apricots in the refrigerator (no one ever believes me that my primary catalyst for baking is "using things up"
 not "I want to make something yummy"... I swear it's true though) and I glanced upon this recipe in Deborah Madison's cookbook, Vegetarian Cooking for Everyone. I liked the idea of the spiciness of the candied ginger balancing out the sweetness of the apricot. In theory, great, in reality - I got a bit more spiciness than I bargained for! So beware if you make this recipe, it is not for the ginger-faint of heart. I did happily discover that a liberal smear of creme fraiche provided a cooling and deliciously creamy counterfoil to the ginger. I can only imagine how decadent a cardamom creme fraiche would be with this muffin....

Ginger Apricot Buttermilk Muffins (makes 12 regular size muffins)

2 1/2 c. all purpose flour
2 tsp baking powder
1 tsp baking soda
1/2 tsp salt
1/2 c. packed light brown sugar
2 eggs, lightly beaten
1 1/3 c. buttermilk
1/3 c. canola oil  (I substituted applesauce, which I believe resulted in a chewier muffin texture, but was healthier)
1 1/2 tsp vanilla extract
1 c. diced dried apricots
1 tsp ground ginger (a little cinnamon or cardamom would also be nice)
1/3 c. diced candied ginger (original recipe calls for 1/2 c.)

1. Preheat oven to 375 degrees F and grease muffin tin.
2. Cover the diced apricots with boiling water and let stand for 10 minutes, until soft. Drain and add ground ginger (optionally cinnamon/cardamom) and candied ginger.
3. Mix the dry ingredients together in one large bowl and the wet ingredients in another bowl (beat the sugar into the eggs first, then add buttermilk, canola oil and extract).
4. Pour the wet into the dry and in a few quick stirs, combine the two, adding in the apricot/ginger mixture just at the end. *stir as little as possible as long as all flour is mixed in*
5. Scoop into tins, filling nearly to top. Bake about 25 minutes until nicely browned and puffy on top.

Wednesday, May 16, 2012

No pictures for you!

Okay, I promise I'm almost at the point of being ready to take on food photos again, but why deny my faithful readers, all 3 of them, the joy of hearing about some great springtime meals? Oh! And a new use for leftovers - as in the leftover liquid in those jars of marinated artichoke hearts? I saved up the liquid from 2 jars for about a month ... thinking maybe it could be used in salad dressing until in a stroke of genius, I realized it's perfect for cooking quinoa in! Gives it such an amazing flavor. I highly recommend this strategic use of marinade liquid.
Spring Tulips
(1) Favorite springtime breakfast: Bircher Muesli and Yogurt, topped with a bit of raspberry puree or maple syrup. This recipe is based on Deborah Madison's muesli recipe with some extra bits thrown in:

Muesli
2 c. rolled oats
1/3 c. wheat bran
1/4 c. ground flax
1/2 c.- 3/4 c. mixed seeds and nuts (at least 1/4- 1/3 c. sunflower seeds, can throw in sesame seeds, pumpkin seeds, pecans, walnuts almonds)
1/4-1/3 c. shredded, unsweetened coconut
1/2- 1 c. dried fruit (currants, raisins, cranberries, or chopped dates/apricots)

1. Stir everything together except the dried fruit and spread on a baking tray. Bake at 375 degrees for 10 minutes. Let cool and transfer to a container, stirring in dried fruit! Voila! I have now started to double the recipe so I can make it less frequently, but it's so easy I don't mind making up a batch in the morning before heading off to work.

(2) I have had some great success with a couple of easy vegetarian dinner mains which I shall herein relate: asparagus and chickpea studded bulgur with tahini dressing, and steamed carrot/broccoli/kale/tofu quinoa with peanut sauce. Both incredibly good as cold leftovers for lunch the next day!

Asparagus and Chickpea Bulgur (Adapted from CityPalate magazine)

1- 19 oz can chickpeas, drained well (or 1 1/2 - 2 c. cooked chickpeas which is what I used)
2 garlic cloves, crushed
1 onion chopped
1/2 - 1 bunch asparagus (thin is better), cut into 1 inch pieces
2 - 3 c. cooked bulgur (I cooked mine with 1 veggie boullion cube)
1/2 c. slived or slivered almonds, toasted
optional: 1 large or 2 medium carrots, finely chopped, parsley

Tahini Dressing (this part is not as accurate... make it to taste!)
1/4 c. tahini
juice of 1 lemon or 1 orange
zest of 1 lemon or 1 orange
2-3 Tbs. extra-virgin olive oil (lemon or orange infused even better)
1/4- 1/3 c. hot water
1 garlic clove, finely crushed
2-3 Tbs. apple cider vinegar

1. Saute the chickpeas in a bit of oil until they start turning golden. Add the garlic and a pinch of salt and cook until the chickpeas start to get a bit crispy around the edges. Transfer to a bowl.
2. Saute the onions until soft. Add the asparagus and carrots to the pan and cook 1-2 min, until the asparagus has brightened and softened just a bit. Dump the asparagus into the chickpea bowl.
3. With a bit of oil, warm the bulgur, and toss the asparagus, chickpeas, carrots, and almonds together until just warmed through.
4. Serve with tahini dressing and sprinkle with parsley if desired.

Veggie Quinoa Dragon Bowls
1 crown broccoli, chopped into 1" pieces (smaller for stems)
2-3 carrots, peeled, chopped into 1" pieces
1 bunch of kale, de-stemmed
1 block of tofu, cubed
2 c. cooked quinoa (or more)  (cooked in some veggie broth, or leftover chickpea cooking broth, or leftover liquid from marinated artichoke hearts)
Ground flax seed

1. Steam the carrots just until tender and set aside. Ditto for the broccoli.
2. Saute the kale until tender and set aside. In the same skillet heat a bit of oil (sesame or canola) and saute the tofu until golden brown on all sides.
3. Top quinoa with veggies, tofu, and a sprinkling of ground flax seed. Add peanut sauce.

Peanut Sauce
Peanut butter (or almond butter)
Sweet chili sauce
Minced ginger
Lime juice
Hot water
Optional: a bit of soy sauce or tamari, or flax seed oil.

I don't have proportions here. but the nut butter should be the largest component, the hot water lets you whip it into a sauce consistency, lime juice for acid, sweet chili sauce for sweetness/spice, and minced ginger for yummy flavor. You can also add a bit of hot garlic chili sauce if you want more spice without sweetness.
The soon to be gone snow...

Tuesday, May 01, 2012

Poor blog, your owner doesn't love you enough.

I'm still getting over cold so I haven't had the energy to really blog about what I've made, but I will in quick summary include a list of noteworthy recipes made in the past week or so. I

#1) Sweet potato hummus. I'm a complete convert to this version of hummus made primarily with sweet potatoes, a bit of chickpeas, tahini, garlic, lemon and spiced with paprika, cumin, cinnamon, cayenne and nutmeg. Note if you have a cold, do not season this hummus alone- you will make it far too spicy for those whose taste buds are not deadened by a stuffy nose...
#2) A vegetarian southern soup of chipotle veggie sausage, kale and collard greens, topped with cornmeal/green onion dumplings OMG from Bon Appetit. Completely worth repeating again and again. Probably even with real meat :)
#3) April's wot bread. This recipe appears in ExtraVeganza. It's a really interesting way to use up leftover brown rice. I quite like the texture of the loaf but it's very dense and doesn't rise at all.
#4) David Lebovitz' brown bread. Must have been trying to use up some buttermilk. Once again, I ended up with bread undercooked in the middle, though I am sure this is no shortcoming of the recipe and rather due to my own oven/timing skills. It would be great though if the cake batter tester would work for once and come out clean because the baked good is actually COOKED THROUGH as opposed to simply coming out clean because the top inch of baked dough manages to scrape off all the uncooked dough on the way out?
#5) Oatmeal applesauce bread. Super pleased with this recipe as it is not very sweet and uses up quite a lot of applesauce and oats. I left out the raisins. Again, issue of uncooked center (my fault not the recipe).
#6) Kale stem pesto - finally a way to use up all those tough chewy stems!

Wednesday, April 25, 2012

Chocolate Matcha Loaf Cake

I was recently given a box of organic matcha tea. I've become known as the "food recycling bin" at work; if you're given a food gift that you'll never use or don't want, you can give it to Emily who will happily accept it and spend inordinate amounts of time figuring out how to use it up.

Last week, not only did one of my coworkers give me a bag full of tofu puddings (sweetened and almond flavor) that I've incorporated into raspberry-kale-banana smoothies (surprisingly good btw), but my boss also gave me the aforementioned box of matcha tea. Now I have long adored both matcha lattes and baked matcha goods but have never prepared either myself. I decided to start out with baked goods and go from there. I made this lovely pound cake recipe found on lifesafeast.


What I will say about it: the perfect pound cake texture, looks beautiful with the contrasting cocoa/matcha colors, and children adore the bright green color. However, it didn't taste enough of matcha for my liking. If I made this again, I would double the amount of matcha and leave out the competing vanilla extract that can too easily mask the subtle grassy flavor of the matcha.


MATCHA AND CHOCOLATE MARBLE LOAF CAKE

2 c. (280 g) allpurpose flour
2 tsp baking powder
3/4 c. (175 g) salted butter, room temperature
3 Tbs (45 g) salted butter, melted
2 Tbs unsweetened cocoa powder
1 1/3 c (270 g) sugar
2 large eggs
1 tsp vanilla (leave out?)
½ c (125 ml) whole milk
1 ½ tsp Matcha tea powder  (increase to 3 tsp)

1. Preheat the oven to 350°F. Butter an 8 x 4" loaf pan. Grease the pan with butter. Line the bottom of the pan (and up the narrow sides) with one long strip of parchment paper. 

2.Whisk together the flour and baking powder.
3. Whisk the 3Tbs melted butter into the cocoa powder in a small bowl until  smooth.
4. In a large mixing bowl, beat the softened butter and sugar until smooth and fluffy. Beat in one egg at a time, followed by the vanilla if using.
5. Add the flour/baking powder into the butter/sugar in 3 additions alternating with the milk, beating in each addition just until blended. Scrape down the sides of the bowl as needed.
6. Remove 1 c. of the batter and add to the bowl containing the cocoa paste. Stir until well blended. Stir the Matcha powder into the remaining batter.
7. Spoon half of the Matcha batter into the bottom of the loaf pan, smoothing  evenly to the edges. Spoon tablespoons of chocolate batter down the center of the Matcha batter in the pan. Spoon the rest of the Matcha batter on top, gently smoothing the surface. Try not to blend the two batters too much.

8. Using a sharp knife with a narrow blade, make about 5 deep swirls through the batter for the marble effect.
9. Bake at 350°F for 25 minutes then reduce the oven temperature to 325°F and bake for an additional 35-40 minutes until the cake is set. If the cake starts to brown too much, loosely cover with aluminum foil.


New Furniture!

The past month has been filled with new furniture - a table, a bed frame, and a couch! Furniture that for the first time makes me think as I edge towards 31 I might be approaching adulthood finally.

This is our kitchen table, which was found online, the most fabulous if not completely solid wood table that can be expanded to four different sizes! It can seat 2, 4, 6 or possibly 8 if you're willing to sit really close to one another :)  The only complaint I have is that the leaves are not stored within the table but this is as close to perfect a table for our apartment as we can get. It is just wonderful to actually be able to seat four people, their plates and cutlery, and the actual serving dishes on the table for once!
 
So it doesn't perfectly match our chairs ...
 
but it does match our kitchen shelf!

AND we got a couch! A real couch never owned by anyone previously! From a real furniture store! The only downside so far is that they forgot to deliver the legs, which are coming next week.  I love that the couch has a modern feel to it without sacrificing any plushy comfort. We now fight over it every evening - who gets to stretch out on the couch and who gets stuck with the futon. No, not  really since our perfect couch is vastly spacious for two and can also comfortably fit three within its loving arms. Now if only we can keep convincing the cat that she is not to set her paws upon this couch! I'm convinced she just waits until I leave for work to curl up on it though...

The gloriously comfortable and perfectly positioned to watch movies from Emily's computer new couch

I will post photos of the bed, but I was too lazy to make it this morning :)

Tuesday, April 17, 2012

Ways you know your life is crazy

1. One week after losing your green kitchen scratchie (for dish scrubbing), you find it in the bag of washed kale in the fridge.
2. You are simultaneously drying laundry and freshly made pasta on the same drying rack.
3. You can't actually find 75% of the things you know are in the fridge because it's too full. Same with the freezer.

Easter Dinner

I am so far behind on my posts but I did want to share some photos from our lovely Easter dinner on our brand new table that expands to seat 8!!! A huge step up in the "grown-up" world of furniture for us.

I found this tart based on the following criteria: meal item must contain goat cheese and must be able to be assembled in advance.  The tart was heartily enjoyed by all - the smooth, tangy filling although filled with goat cheese, artichoke hearts, parmesan and greek yogurt tasted surprisingly light. The polenta crust was lovely and not too heavy. My only warnings would be that I think there needs to be more liquid in the polenta so it doesn't dry out during the baking time and that it's better to have a thicker bottom crust than side crust. I used a 10" springform pan and as long as you run a thin knife or spatula around the edge of the polenta crust before opening the pan, you should be able to produce a perfectly intact crust.


Artichoke Polenta Tart (Maria Speck)

Polenta Crust
  • 1 1/2 c. water
  • 1 1/2 c. broth
  • 1 1/4 c. polenta
  • 1/2 c. parmesan, grated
  • 1 egg
  • 1/4 tsp freshly ground pepper
  • 1/4 tsp sea salt

1. Bring the water and broth to a boil. Pour the polenta in a slow stream, whisking to combine. Remove from heat. Cover and let sit for 10 minutes, stirring once or twice.
2. Remove the lid and let cool for 5-10min. While it cools, line the bottom of a springform pan with parchment paper and grease the sides of the pan.
3.Stir in the egg, parmesan, salt and pepper into the polenta. Get a cup of cold water. Dip your fingertips/hands into the cold water and press the polenta into the springform pan. You want a thickness of about 3/4" for the crust.
4. Press the polenta into the bottom of the pan and up the sides. You should be able to get a crust height of 4-5". Set aside. Preheat oven to 375 degrees F.

Filling
  • 12 oz can marinated artichoke hearts, drained
  • 1/2 c. crumbled goat cheese
  • optional: sorrel or spinach - a small handful
  • 1 c. plain greek yogurt
  • 2 large eggs
  • 1/4 - 1/2 c. finely chopped green onions
  • 2-3 Tbs freshly chopped parsley or 1-2 Tbs dried parsley
  • 1/4 tsp freshly ground pepper
  • 1/4 tsp sea salt
  • 1/3- 1/2 c. parmesan

1.  Spread the artichoke hearts over the bottom of the polenta crust. Crumble the goat cheese on top. Add sorrel or spinach if using.
2.  Beat the yogurt, eggs, green onions, pepper, sea salt and parsley together. Pour over artichokes and goat cheese.
3. Sprinkle the parmesan over the top of the tart.
4. Bake for 45 min. Center should appear mostly firm when tart is gently shaken. Parmesan should be golden brown on the top.
5. Remove from oven and place on cooling rack for 20-45 min. You can serve immediately or place in the fridge for later. It's best at room temperature or warm.


Spanish Banks, looking back at downtown Vancouver
Best Easter crew gathering ever!