Showing posts with label baked. Show all posts

Thursday, November 01, 2012

Pear-cranberry crumble

Actually I believe it's a crisp, though who really knows what the true distinction is here. According to some sources of information, a crisp can include oats in the topping, but a crumble is more British, less sweet, and is a "streusel" of butter, flour, and sugar. I have seen a fair share of crumble recipes that include oats too though. I guess it is more appropriate to say I made a crumble (drum roll for the pun) as my hopes crumbled after I tasted this dish...

I had beautiful red organic pears from the farmers market, fresh cranberries and ginger - autumn colors, spice, delectable brown sugar oat topping - but something went awry. I blame the vanilla and the overly sweet combo of crisp topping and the filling ... Needless to say, I fed it to others who loved it regardless, thanks to those who so willingly eat what I make.

Yesterday, I tackled the recipe again, determined to correct for my earlier recipe foibles. I adapted the filling to lessen the sugar, completely remove the vanilla and add ginger/black pepper for spice. I also made up the crisp topping - which isn't quite 100% where I want it - if you have a crisp topping you love, feel free to substitute, but make sure to include some cinnamon and ginger in it!

Pear-Cranberry Crumble
Filling:
  • 2 lbs (a bit less is fine too) of pears (before cutting), cored, sliced thinly
  • 1 3/4 c. fresh cranberries
  • 2 tsp minced ginger, fresh
  • 1 Tbs lemon juice
  • 1/2 - 1 tsp finely grated lemon zest
  • 1/4 c. granulated sugar
  • 1 Tbs cornstarch
  • 1/4 tsp freshly ground black pepper

Crisp topping:
  • 1/2 cup all-purpose flour
  • 1 cup quick oats
  • 1/3 cup packed brown sugar
  • 1 teaspoon ground cinnamon
  • Dash of salt
  • 1/3 - 1/2 cup chilled butter, cut into small pieces 
  • 1/2 tsp ginger
  • optional 1/4 c. chopped nuts (walnuts or pecans)
1. Preheat oven to 350 degrees F.
2. Stir the sugar and cornstarch together until well mixed. Stir together with the rest of the filling ingredients. If you want to save a dish, you can do this directly in the casserole dish to be used for baking.  Set aside.
3. In another bowl, Stir together all the crisp ingredients except for the butter (and the nuts if using). Then cut in the butter until crumbly. I find hands can work better for this than a pastry cutter with the oats. Stir in nuts.
4. Evenly distribute the topping over the filling in a casserole dish (oval 2.5 qt) and bake for 40-50 minutes.

Sunday, September 30, 2012

Hot Cocoa Cookies

It's not quite the fall weather that really begs for cups of steaming cocoa to stave off the grey, cold nights just yet. I feel so grateful that almost every weekend in September has been sunny and gorgeous - allowing us to squeeze in a trip to Ambleside Park on the north shore, play some frisbee golf, cycle to church, stroll to the farmers market, and enjoy walks around the nearby lake.

However, we did host a games night and as always, I rummaged through my pantry to figure out what needed using up. As it turns out, the most pressing thing to get rid of was marshmallows. Marshmallows... what do you do with them other than s'mores and rice krispies treats? (I already crossed option 2 off the list since it meant buying rice krispies and ending up with leftover cereal)  Rachael Ray had the perfect solution with her hot cocoa cookies. A warm chewy chocolate cookie with a perfectly browned marshmallow on top (assuming you don't burn it under the broiler) hiding a surprise square of melted chocolate underneath. Just delicious. They were a huge hit - if you want to go for a rocky road style, you could use chocolate with almonds for the 7.5 oz in the recipe (i think sea salt would be good too!) The one danger is overcooking the cookie while you're trying to get the marshmallows melted so I would suggest under-baking a bit more if you want to use the broiler method AND WATCH THEM LIKE A HAWK. 
Hot Cocoa Cookies (Source: EveryDay with Rachael Ray Magazine)
makes 36-42 cookies
  • 1 stick salted butter (1/2 c.)
  • 6 oz bittersweet chocolate, chopped
  • 6 oz semisweet chocolate, chopped  (or  8 oz bitter sweet: 4 oz semisweet)
  • 1 1/2 c. flour
  • 1/4 c. unsweetened cocoa powder (I used dark cocoa powder)
  • 1 1/2 tsp baking powder
  • 1/4 tsp salt
  • 1 1/4 c. light brown sugar (not packed)
  • 3 eggs, room temperature
  • 1 1/2 tsp vanilla extract
  • 30 marshmallows, cut in half
  • 7.5 oz dark chocolate bars (e.g. Lindt) cut into 1" squares
 1. Melt the butter and chopped chocolate over low heat in a thick saucepan, stirring frequently. Remove from stove and let cool for 15 min.
2. Whisk the flour, cocoa powder, baking powder, and salt together.
3. Beat the sugar, eggs, and vanilla with a mixer for 2 minutes on low speed. Then scrape in the melted chocolate and mix just until combined. Add half the flour mixture, mixing (or stirring) on low until just combined. Add the other half of the flour mixture, repeat. Cover the bowl and place in the refridgerator for 50-60 min.
4. Preheat the oven to 325 degrees F and use parchment paper to line two baking sheets. Use a cookie dough scooper (or some other device) to form 1" diameter balls. Roll them to acheive a round shape. Place about 2" apart on each cookie sheet and press them with the palm of your hand to flatten slightly. Bake about 10-12 minutes.
5. While they bake, stick the squares of marshmallows onto the cut side of the marshmallows.
6. Take the cookies out and press the chocolate side of the marshmallow into the cookie. Option 1: bake ~4 minutes just until the marshmallows are softened. Option 2: switch the oven quickly to broil and broil about 30 sec - 1 min - you should see the marshmallows beginning to puff and turn golden.
7. Remove from oven and let cool for 5 minutes before transferring to rack.

Wednesday, September 12, 2012

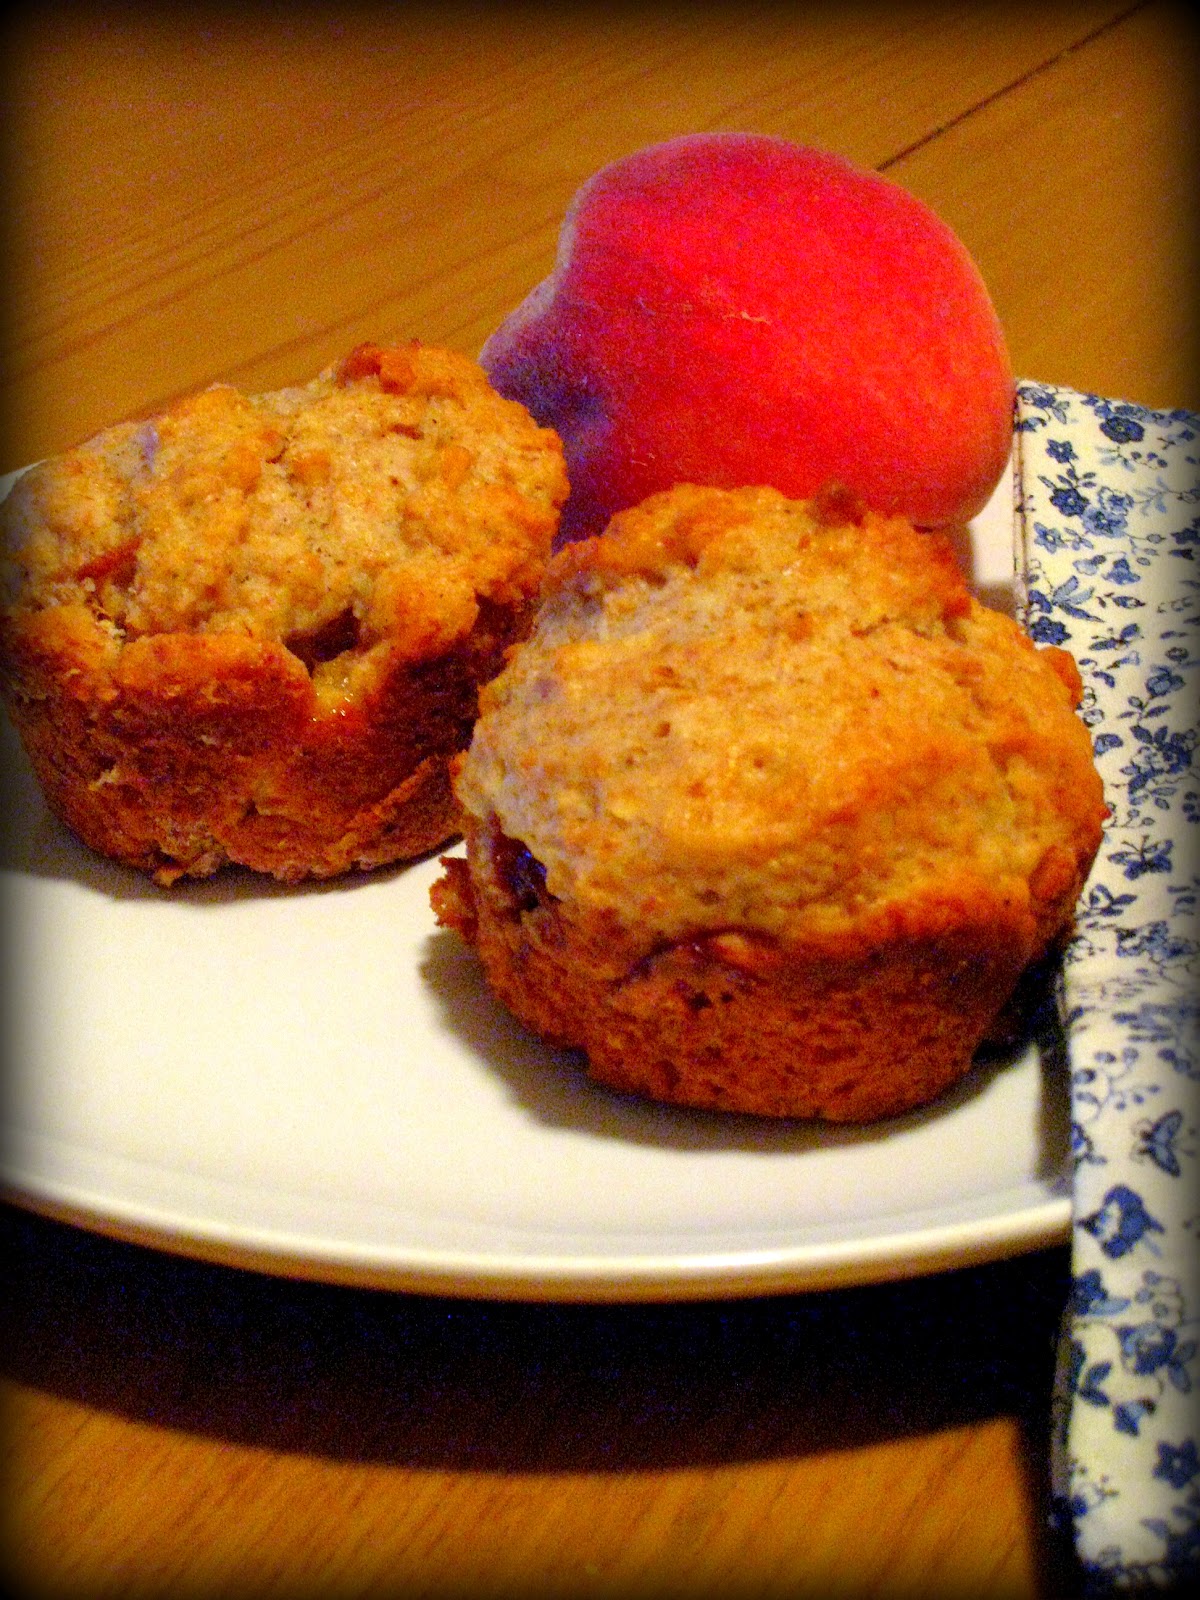
Peach Muffins

Do you find yourself with leftover juice from canned pears, peaches, etc and wonder if there is any use for it? Good news for you! It can be used in place of apple juice in muffin recipes. I don't remember why I bought a can of peaches as I am normally adverse to any store-bought canned fruit and its syrupy water, but I did and I finished all the peaches while the syrup sat in my fridge. This is one of those times of the year where I simply cannot afford to have spare things sitting in my fridge. So I pulled up this recipe for apple muffins and modified away! It was the perfect muffin consistency, not too sweet, and subtly peachy.

Peach Muffins

  • 1 cup all-purpose flour
  • 1 cup whole wheat flour 
  • 1/4 c. wheat bran or wheat germ
  • 1/4 - 1/3 cup white sugar (I used 1/4 c. and it could have been just a touch sweeter)
  • 3 teaspoons baking powder
  • 1/2 teaspoon salt
  • 3/4 cup peach syrup
  • 1/3 cup vegetable oil
  • 1 egg
  • 1 1/2 teaspoons ground cinnamon
  • 1/2 tsp freshly grated nutmeg
  • possible some ground ginger?
  • 1 cup fresh chopped peach or nectarine (or leave out and substitute 1/2 c. chopped walnuts)
  1. Heat oven to 400 degrees F. Grease muffin tin or line with baking cups.
  2. Whisk flours, sugar, baking powder, salt, and spices together. In a small bowl, whisk peach juice, oil, and egg. Add wet ingredients to dry; stir until dry ingredients are almost moistened, then stir in chopped fruit or walnuts.
  3. Fill muffin cups 2/3 full (I used a 1/4 c. filled to the top for each muffin cup and it worked perfectly) Bake for ~20 minutes. Let cool for 1- 2minutes before removing muffins from pan.

Saturday, August 18, 2012

Birthdays and Cake

It's that time of year - the celebrating and remembering of a birthday, which always merits some reflection, some ridiculousness, and a good dash of hopeful planning for the future. As I took a day off from work to celebrate by myself, I was reminded how good it is to spend quality alone time with oneself, to recall exactly what it is one likes to do on one's own, reading a book, strolling through markets and galleries, enjoying the sights and sounds and smell of life (an in particular a fresh coconut donut and americano), and cycling in the summer sunshine by the ocean. All good things to be thankful for.

Turning 31 in many ways is so much better than turning 30; there's a lot of hype and hoopla around 30 to live up to, an expectation of extravagant celebration, whereas 31- there are no preconceived notions of what a celebration might look like. Celebrating alone is not out of the question (though who is truly alone these days with Facebook...)  I think 31 will be a very good year. And really, this is the year I take that sword fighting class I've been thinking about for so long.

Cake! What's a birthday without a dessert? To keep going with the changing it up theme for 31 I actually baked myself a birthday dessert WITHOUT chocolate. Shocking, I know. I had peaches on my mind though (could be my impending trip to Georgia)  - something not too heavy, sweet, delicate, and requiring fairly minimal effort (it was my birthday after all). Bill Granger's peach, almond, and yogurt cake was the perfect match (found on a defunct but excellent blog called Almost Bourdain) and I would happily bake it again. Maybe next time I will try to ensure there are more people around so I don't end up eating 60% of my own cake? Maybe... :)  Warning: this cake takes an hour and a half to bake once it's assembled and then you have to let it cool, so make sure you don't start baking it at 9pm unless you're a night owl!

Peach, Almond, Yogurt Cake

220 g (7 3/4 oz) salted butter, softened  (almost 2 sticks)
250 g (9 oz) sugar
1 tsp natural vanilla extract (I would try replacing this with almond extract or use 1/2 tsp almond & 1/2 tsp vanilla)
3 eggs
2 1/2 cups all purpose flour
5 tsp baking powder
50 ml (1 3/4 fl oz) milk
1 cup yoghurt

450 g (1 lb) small peaches, chopped [USE FRESH OR FROZEN, NOT CANNED]
50 g (1 3/4 oz) flaked almonds
Alternate topping: handful of whole almonds (1/2 cup?) and citrus zest (1/2- 1 tsp) pulsed in the food processor to a fine crumb. Sprinkle over cake and bake. I loved this version, though it is messier.

1. Preheat oven to 325 degrees F. Grease a 9" spring form pan all over and then line the bottom with parchment paper.
2. Cream the butter and sugar in a mixer on  high speed for ~5 minutes until light and fluffy. While the mixer is going, sift the flour and baking powder together and set aside. Add vanilla (or almond extract) and eggs one at a time to the butter-sugar mixture, beating well after each.
3. Add half of the flour, half of the yogurt, and all the milk to the batter. Mix at low speed 30 sec - 1 min, scraping the sides. Then add remaining flour and yogurt and mix at low speed until combined (30 sec - 1 min).
4. Gently fold through the chopped peaches and pour the batter into the the springform pan. Sprinkle with almonds (or almond crumb). Bake for 1.5 hours.
5. Let cool for 15-20 minutes before removing the ring of the springform pan.

*photo to come.

Friday, August 17, 2012

Ginger Ale Bread

What's that? Ginger ale bread??  You can put soda in bread?!?!?!! Indeed, that was the very same reaction I had, but as you know (or may not know) when you have 12 oz of stale ginger ale sitting in your refrigerator for more than 2 weeks, desperate times call for desperate measures. I did honestly consider just pouring it down the drain for about 5 minutes, but then the spendthrift in me won out and onto the internet I went, googling "ginger ale bread". Lo and behold, I am not the only crazy person to believe in this combination. As luck would have it, a recipe very similar to my favorite beer bread recipe appeared on Window on the Prairie's blog.

With a few modifications, the loaf emerged, shockingly risen despite the flatness of the soda, and so white when it came out of the oven that wife remarked, "what's wrong with it?" (maybe this was the warning sign of under-baking!) The subtle smell of ginger ale wafting up from the still steaming loaf was appealingly intoxicating. Upon slicing into the loaf, it was sadly revealed that it was under-baked. So I can't really speak to how good the texture would be if it were correctly baked. Taste-wise, it's not the most exciting of flavors and I would definitely add something else like more ginger or nutmeg or citrus zest. But I can see why it would be a nice pairing with fruit jams or berry compotes. Oh well, it was an experiment and it got the ginger ale out of my fridge.

Ginger Ale Bread
  • 3 cups all purpose flour
  • 2-3 tablespoons sugar
  • 1/4 - 1/2 tsp salt
  • 1- 2 tsp grated fresh ginger
  • 1 tablespoon baking powder
  •  12 oz can of ginger ale, at room temperature
1. Preheat oven to 350 degrees F.
2. Sift flour, sugar, salt, baking powder, and spices together.
3. Pour ginger ale into dry ingredients and mix through with as few strokes as possible.
4. Transfer batter to greased 9x5" loaf pan and bake for ~40 minutes until golden brown and cooked through.
5. Let cool on wire rack for 10-15 minutes before removing from pan. 

Tuesday, July 03, 2012

Raspberry Balsamic Kefir Muffins

One of the advantages of having a mother with a large raspberry patch is free, fresh berries -- unless you live across a border over which they cannot be transported. :( We've gotten around this restriction by canning large amounts of raspberry puree that can be taken across the border without issue and I then happily incorporated into smoothies, pancake toppings, yogurt breakfast, and other baked goods. I recently found this recipe for a strawberry-balsamic vinegar-goat cheese muffin and immediately thought of switching it up with a raspberry-basalmic-kefir cheese muffin. I have never had such rave reviews about muffins from the wife before! Clearly a keeper recipe. What I like about this recipe is the subtle tendency towards savory with the balsamic/black pepper addition. Definitely a muffin for the grown-up palate.


Muffin Batter (makes 10-11 muffins)

  • 4 tablespoons butter
  • 1 1/2 cup all-purpose, unbleached flour
  • 1/2 cup sugar
  • 1 1/2 teaspoon baking powder
  • 1/4 teaspoon baking soda
  • 1/4 tsp salt
  • 1/2 cup kefir cheese* with ~1-3 Tbs warm water (or greek yogurt)
  • 1 egg
  • 1/2 cup Raspberry-balsamic sauce (See below)

Raspberry Balsamic Sauce
  • 3/4 c. raspberry puree
  • 1/4 c. balsamic vinegar
  • 1/8 - 1/4 tsp freshly ground black pepper

  1. Preheat oven to 375 degrees F. Grease muffin tins (or use muffin liners).
  2. Melt butter and let cool for 2-3 minutes.
  3. Whisk flour, sugar, baking powder, baking soda and salt together.
  4. Combine kefir cheese, egg, and melted butter in separate bowl. Add to dry ingredients and stir just until moistened.
  5. Lightly fold in raspberry-balsamic sauce.
  6. Scoop batter evenly into muffin pan and bake for 20 minutes. Let sit for 5 minutes before removing from pan to cooling rack.

Wednesday, April 25, 2012

Chocolate Matcha Loaf Cake

I was recently given a box of organic matcha tea. I've become known as the "food recycling bin" at work; if you're given a food gift that you'll never use or don't want, you can give it to Emily who will happily accept it and spend inordinate amounts of time figuring out how to use it up.

Last week, not only did one of my coworkers give me a bag full of tofu puddings (sweetened and almond flavor) that I've incorporated into raspberry-kale-banana smoothies (surprisingly good btw), but my boss also gave me the aforementioned box of matcha tea. Now I have long adored both matcha lattes and baked matcha goods but have never prepared either myself. I decided to start out with baked goods and go from there. I made this lovely pound cake recipe found on lifesafeast.


What I will say about it: the perfect pound cake texture, looks beautiful with the contrasting cocoa/matcha colors, and children adore the bright green color. However, it didn't taste enough of matcha for my liking. If I made this again, I would double the amount of matcha and leave out the competing vanilla extract that can too easily mask the subtle grassy flavor of the matcha.


MATCHA AND CHOCOLATE MARBLE LOAF CAKE

2 c. (280 g) allpurpose flour
2 tsp baking powder
3/4 c. (175 g) salted butter, room temperature
3 Tbs (45 g) salted butter, melted
2 Tbs unsweetened cocoa powder
1 1/3 c (270 g) sugar
2 large eggs
1 tsp vanilla (leave out?)
½ c (125 ml) whole milk
1 ½ tsp Matcha tea powder  (increase to 3 tsp)

1. Preheat the oven to 350°F. Butter an 8 x 4" loaf pan. Grease the pan with butter. Line the bottom of the pan (and up the narrow sides) with one long strip of parchment paper. 

2.Whisk together the flour and baking powder.
3. Whisk the 3Tbs melted butter into the cocoa powder in a small bowl until  smooth.
4. In a large mixing bowl, beat the softened butter and sugar until smooth and fluffy. Beat in one egg at a time, followed by the vanilla if using.
5. Add the flour/baking powder into the butter/sugar in 3 additions alternating with the milk, beating in each addition just until blended. Scrape down the sides of the bowl as needed.
6. Remove 1 c. of the batter and add to the bowl containing the cocoa paste. Stir until well blended. Stir the Matcha powder into the remaining batter.
7. Spoon half of the Matcha batter into the bottom of the loaf pan, smoothing  evenly to the edges. Spoon tablespoons of chocolate batter down the center of the Matcha batter in the pan. Spoon the rest of the Matcha batter on top, gently smoothing the surface. Try not to blend the two batters too much.

8. Using a sharp knife with a narrow blade, make about 5 deep swirls through the batter for the marble effect.
9. Bake at 350°F for 25 minutes then reduce the oven temperature to 325°F and bake for an additional 35-40 minutes until the cake is set. If the cake starts to brown too much, loosely cover with aluminum foil.


Friday, March 23, 2012

Chocolate Beer Cookies with Salted Caramel Frosting

These cookies destroyed my Lenten vows of no dessert/no chocolate. For 3 days in a row. I tried to forgive myself on Sunday since it's the mini-Easter reprieve from Lent, but Monday was willful and deliberate ignoring of my fast. I rationalized it at the time by telling myself I was saving my wife from having to eat them (she had been complaining about too much unhealthy food over the weekend and wanting to get back to normal come Monday). So it was an act of love/an act of sacrifice on my part?
 I only had lager on hand and being the cheapskate that I am, that's what I used in the cookie dough. I am 100% certain that a really nice chocolate,oatmeal or espresso stout would knock the cookie batter out of the park though. The other perk of this recipe is that it only uses half a beer, leaving me half a beer to drink (the perfect size for me). The cookies turned out moist and almost cake-like, studded with melted chocolate chips, and when topped with salted caramel frosting and crunchy salty pretzel bits, the combo was divine!!!!! Yep it was a pretty spiritual food experience.

The one lesson I learned: pretzels on frosting go STALE. So, if you make this recipe, only frost as many cookies as you anticipate eating at that seating. Then when you want more, reheat the frosting, dunk the cookies and apply fresh pretzels because you really do want the crunch factor.

Chocolate Stout Cookies with Salted Caramel Frosting (from cravingchronicles)

  • 1 1/2 cups flour
  •  1/4 cup unsweetened cocoa
  • 1 tablespoon dark cocoa 
  •  1/4 teaspoon salt
  •  1/2 teaspoon baking soda
  •  1 teaspoon baking powder
  •  1/2 cup (1 stick) butter, at room temperature
  •  1/2 cup dark brown sugar
  •  1/2 teaspoon vanilla
  •  1 egg
  •  6 ounces stout beer (such as Chocolate Stout or Oatmeal Stout, or whatever beer you have on hand)
  •  1 1/2 cups semisweet chocolate chips (or bittersweet chocolate chips)
  • 1 batch Easy Salted Caramel Frosting (below)
  •  1 bag of salted pretzels (I used multigrain pretzels)

1. Preheat oven to 350°F. Line baking sheets with parchment paper.
2. In a medium bowl, whisk together the flour, cocoa, salt, baking soda, and baking powder.
3. Beat butter with brown sugar using a mixer until light and fluffy, about 3 minutes. Beat vanilla and egg in. With the mixer on low, add flour mixture in thirds, alternating with the beer. Beat just until combined. Fold in chocolate chips with a spatula.
4. Chill dough in the fridge for about 15 minutes.
5. Using a 2-tablespoon cookie scoop, scoop dough onto prepared baking sheets about 2 inches apart. Bake at 350°F for 15-17 minutes or until tops spring back lightly when touched. Cool on pan for 2-3 minutes, then transfer to a wire rack.

Easy Salted Caramel Frosting

  • 1/2 cup (1 stick) salted butter
  •  pinch or two of salt
  •  1 cup packed brown sugar
  •  1/4 cup heavy cream
  •  1 tsp vanilla extract
  •  1 cup powdered sugar

1. In a medium saucepan, melt butter, salt and brown sugar over medium heat, stirring to combine. Bring mixture to a boil, whisking frequently for 1-2 minutes.
2. Remove from heat and immediately whisk in cream, followed by vanilla. Cool 5-10 minutes.
3. Whisk in ~1 cup powdered sugar until smooth. 

To Assemble
Spread frosting over cooled cookies.
Crush pretzels into small pieces (put them in a bag and roll over the bag with a rolling pin). Spread pretzel crumbs out in a plate. 
Dip each cookie frosting side down in the pretzel crumbs, pushing lightly to make sure they stick.

Saturday, February 11, 2012

Pumpkin Cornbread and Bean Broth Soup

Last night I tried a pumpkin cornbread recipe from tasty kitchen, which  I have to say is a pretty delicious though unusual combination - a bit more like pumpkin cornbread cake rather than a savory cornbread. Future recipe alterations may fix this though!  Little did I know when I started assembling the recipe that the scant amount of cornmeal remaining in my pantry would not fulfill the recipe requirements. So I did what an insane person would do - make up the difference with semolina and instant grits - and it worked!


I paired this with yet another genius use of leftover bean stock - from both a crockpot of black beans and a pot of chickpeas. Very economical as it also uses up a huge handful of leftover cilantro stems. I added quinoa for protein in the dish. Simple but taste effective.

Mexican Broth Soup
  • 2 medium onions, chopped
  • 3-5 cloves garlic, minced
  • 1 750g yogurt container of black bean broth (from crockpot black beans)
  • 1 750g yogurt container of chickpea broth (from 1 c. chickpeas cooked with 2 cloves of garlic, 1-2 Tbs onion flakes and salt)
  • 1-2Tbs cumin
  • 1/2 c. quinoa, uncooked (or use ~1 c. already cooked)
  • 1 bunch of cilantro stems, finely chopped
  • canned chipotle pepper sauce (I just defrosted a jar of unused chipotle peppers from the freezer and spooned out about 3-4 Tbs of the sauce)
  • 1 quart canned tomatoes and juice
  • 1 1/2 c. frozen corn
  • 1 29 oz can hominy
1. Saute the onions and garlic until nicely browned and cooked in a large soup pot. When they have caramelized and left a bit of residue on the bottom of the pan, pour in the two containers of broth. 
2. Add the cumin, cilantro stems, chipotle pepper sauce and quinoa in, bring to a boil and reduce to simmer until the quinoa is cooked. (if it's already cooked you can skip this step and throw everything in at once).
3. When the quinoa is tender, add in the corn, hominy and tomatoes.
4. Taste for flavors and adjust as needed.
5. Serve with a bit of sour cream, kefir cheese, or grated cheddar cheese. Some shredded cabbage would also taste lovely on top with a squeeze of lime and avocado chunks. Or you can keep it simple and eat it as is with a piece of pumpkin cornbread alongside.


Pumpkin Cornbread (from Tracy(sugarcrafter) on tastykitchen)
1 c. all purpose flour
1 Tbs baking powder
1/2 tsp cinnamon
1/4 tsp nutmeg
1/2 tsp chili powder (optional)
1 tsp salt
1/2 c. brown sugar, not packed. *I would try reducing this to 1/4 c. brown sugar*
1 c. cornmeal
1 c. pumpkin puree
1/4 c. olive oil
1 1/2 Tbs molasses

1.Preheat oven to 400 degrees F and butter an 8×8″ baking dish.
2. Whisk together dry ingredients from flour to cornmeal.
3. In a small bowl, beat the eggs lightly and then beat in pumpkin, oil, & molasses.
4. Add the wet ingredients to the dry, stirring just until combined and then pour the batter into the pan.
5. Bake ~30 minutes or until a toothpick test in the center comes out clean.

Monday, January 30, 2012

Pumpkin Muffins & Bread (or January, the unexpected month of pumpkin)

So when I went on my pumpkin buying spree last November, it does indeed appear that I overbought. Proof is in the fact that I still have 3 large cans of pumpkin in my pantry and now January shall be known as the unexpected month of pumpkin. However, I can't complain since I have discovered 3 beautiful pumpkin recipes! The scones have already been posted, but to that delight is added the best pumpkin muffins ever and a fabulous vegan pumpkin bread (non-vegans will also love it)! Both baked items can also be made sweeter by a ginger frosting accompaniment, but that's just icing on the cake :)

 I would also like to take this opportunity to re-explain the lack of photos. My flaky monitor died in December. I took it to be repaired the first week in January. It was incurable, but still under warranty so a new monitor was ordered. It took 3 weeks to get here! We picked it up, brought it home and unpacked it. It did not come with a power supply cord and of course, the old power cord  does not fit the type of power supply plug-in on the new monitor. I have no way to supply it with power or turn it on, so in essence I still have no monitor. Now I'm waiting for a cord....    in the meanwhile, time to start uploading photos onto someone else's computer so I can finally post them!

Pumpkin Muffins (slightly adapted from the Food Network)
  • 1 c all-purpose flour
  • 1 c whole wheat flour
  • 1 tsp baking soda
  • 1/2 tsp salt
  • 1 tsp cinnamon
  • 1/2 tsp ginger
  • 1/4 tsp cloves
  • 1/8 tsp nutmeg
  • 3/4 c packed dark brown sugar
  • 3 Tbs blackstrap molasses (Do NOT use fancy molasses, the muffins will be sweeter)
  • 1/4 c canola oil (optionally use applesauce)
  • 2 large eggs
  • 1 c canned pumpkin
  • 1 tsp vanilla extract
  • 3/4 c buttermilk (or milk with 1 Tbs vinegar, or kefir milk which is what I used)
  • 1/4 - 1/2 c. salted roasted pumpkin seeds for topping
1. Preheat oven to 400 degrees F. Grease a 12-cup muffin pan (silicone works excellently!)

2. Whisk together flours and spices.
3. Whisk together sugar, molasses, oil and eggs until thoroughly mixed. Then whisk in the pumpkin and vanilla.
4. Add the wet ingredients to the dry in two batches, alternating with buttermilk. Stir until just combined.
5. Pour batter into muffin pan and sprinkle tops with pumpkin seeds.Bake for ~20 minutes until done.

6. Let cool for 5-10 minutes before removing from pan. Finish cooling on a rack.

Pumpkin Bread (Vegan)   (from OhSheGlows)

  • 1 c canned pumpkin
  • 3 tbsp maple syrup
  • 3/4 c sugar
  • 1/3 c coconut oil, softened or canola oil
  • 1/4 c blackstrap molasses (Do NOT use fancy molasses!)
  • Chia egg (1 tbsp chia + 3 tbsp water)
  • 1 2/3 c all-purpose flour
  • 1 1/4 tsp baking soda
  • 2 tsp pumpkin pie spice (OR 1 tsp cinnamon, 1/2 tsp nutmeg, 1/2 tsp ginger)
  • 1 tsp sea salt
  • 1 tsp baking powder
  • 1/8 tsp ground cloves
  • 1/2 c chopped walnuts
1. Preheat oven to 350 degrees F.
2. Grease a loaf pan and line the bottom with parchment paper.
3. Mix the pumpkin through chia egg until well blended.
4. Combine the dry ingredients together in another bowl.
5. Add the wet ingredients to the dry, and stir well. Stir in the walnuts.
6. Pour the batter into the pan and bake for ~50-60 minutes.

Saturday, January 21, 2012

Pumpkin Scones Version II

Weekly meetings = weekly baking excuse. I bought some whipping cream to go with a previous cake I made, but no one was interested at the time, so the cream has been sitting in my fridge. Every time I open the door, it says "make scones, make scooooones" in a haunting voice. I also happened to have some pumpkin sitting in my fridge from another dessert I made, a vegan pumpkin gingerbread loaf which I will soon post about as it is my new go-to recipe for a pumpkin loaf. Ergo, I searched the internet far and wide, scrolling through as many as 5 pages worth of google search responses to find "the recipe" that uses whipping cream and pumpkin in the dough. There are surprisingly few recipes that do. But I came across a little gem from tastykitchen, that I wanted to share with you in case you too are someday being taunted by whipping cream from your fridge and are simultaneously at your wit's end about how to use more canned pumpkin.

PS Not surprisingly, there are no photos. I accept that this is an inferior blog with little visual evidence of my culinary adventures and I will never win a blog award. But it makes me happy. These scones were gone in less than 24 hours. Note they are not a sweet scone at all, so a little spiced frosting or maple syrup frosting would not go amiss for those of us with a needy sweet tooth.

Pumpkin Scones
 2 c. flour
1/3 c. tightly packed brown sugar
2 tsp. baking powder
1/4 tsp salt
1 tsp cinnamon
1/2 tsp ground ginger 
1/2 tsp ground nutmeg
1 tsp lemon zest, optional (I included it)
1/2 c. butter, salted (if you use unsalted, boost the added salt to 1/2 tsp)
1/2 c. canned pumpkin (not pie filling!)
1/2 c. whipping cream

1. Preheat oven to 400 degrees F.
2. Mix dry ingredients together well, stir in lemon zest.
3. If the butter is frozen, you can grate it into the dry ingredients. If it's fridge temperature, cut it into small chunks and then use a pastry cutter or fork to cut it into the dry ingredients until the mixture resembles a coarse meal with a few pea-sized chunks of butter.
4. Beat the whipping cream and pumpkin together until smooth.
5. Gently fold the wet ingredients into the dry ingredients just until moistened. Turn out onto a lightly floured surface and knead gently together 3-4 times until the dough comes together. (it may still be a bit crumbly).
6. Press into a circle about 1" thick. Cut into 8 wedges. Bake for ~25 minutes until golden.

Saturday, January 14, 2012

Two Cakes

The great thing about a new years resolution is all the ways you can creatively break it :)  Like justifying baking two cakes in a weekend because you are going to two different friend's houses for dinner! And you can't arrive empty handed or offer up a partly consumed cake...
Honey Spiced Cake

I ended up trying out a recipe for a Honey Spiced Cake from the  Land'o Lakes Dessert cookbook (surprisingly good recipes), and a Lemon Polenta Cake from Deborah Madison's Vegetarian Cooking.

For the Honey Spiced Cake, I substituted yogurt for the sour cream in the cake and also strained yogurt to thicken it for use in the topping. The cake was simple to prepare, and the delicate honey flavor pairs perfectly with the spices, orange, and the tangy bite of yogurt. Be careful about baking too long and drying out the cake though!

Honey Spiced Cake
1/2 c. firmly packed brown sugar
1/4 c. butter, softened  (I used margarine)
1/3 c. yogurt
1/3 c. orange juice
1/4 c. honey
2 egg whites
2 c. all-purpose flour
1 tsp baking soda
1 tsp cinnamon
1/2 tsp ginger
1/4 tsp salt

Orange Cream:
2/3 c. thickened yogurt (Greek yogurt)
1 tsp grated orange peel (or more)
1 Tbs orange juice
1-2 Tbs powdered sugar

1. Heat oven to 325 degrees F.
2. Mix all dry ingredients (except sugar) together in one bowl and set aside.
3. In another bowl, beat brown sugar and butter together at low speed until combined. Beat in sour cream, honey and egg whites, then orange juice. Add in dry ingredients and beat until well mixed.
4. Pour into greased 9 inch round cake pan (line the bottom with parchment paper to make removal easier).  5. Bake for 35-40 minutes until cake tester in center comes out clean. Let cool in pan for 10-15 minutes before turning out onto cooling rack.
6. In a small bowl, stir together ingredients for orange cream, let sit in fridge until ready to serve alongside slices of cake.

The polenta cake is definitely a classier dessert when paired with any kind of fruit/fruit coulis, liquer, and /or whipped cream. I opted to pair it with sauteed peaches and a splash of amaretto. I didn't have the almond extract the recipe called for so substituted 2 Tbs of amaretto instead. I'm glad I did - the almond flavor was barely there, and I enjoyed the predominant lemon flavor of the cake instead. I think you could also slice the cake and briefly fry it in a little bit of butter on both sides as another option of serving.

Lemon Polenta Cake (makes 1 loaf) 
1/4 lb butter, unsalted (you can use salted if that's all you have)
1 c. sugar (not sure how this would change the loaf, but 3/4 c. might be nicer for less sweet)
Finely grated zest of 1 lemon (a big lemon = more zest = better)
3 eggs, room temperature
1 tsp vanilla
2 Tbs amaretto (or 1/2 tsp almond extract or2 Tbs lemon juice)
1/2 c. yogurt
1/2 c. + 2 Tbs cornmeal
1 c. flour
1/2 tsp. baking powder
1/4 tsp salt

1. Preheat oven to 350 degrees F. Grease and flour a 4x10" or 5x8" loaf pan.
2. Cream the butter, sugar, and zest until light and fluffy (beating on high for 3-5 minutes). Add the eggs one at a time, followed by vanilla, almond extract (whatever), and yogurt.
3. Stir all the dry ingredients together. Add to wet ingredients and stir in.
4. Spoon in the batter into the pan, smoothing the top, and rap the pan once on the counter top to remove any hidden air bubbles. Bake in the oven until the top is golden brown and cake tester comes out clean - 50-60 minutes.
5. Let cool in loaf pan for 10 minutes, then turn out onto cooling rack. Serve with warmed sliced peaches (fresh or frozen), berries, amaretto, etc. A bit of whipping cream for luxury :)

Thursday, November 10, 2011

Pumpkin Extravaganza Continues... Pumpkin Scones!

I had so much leftover maple cream cheese frosting from the pumpkin whoopie pies that I decided pumpkin scones were in order. So many recipes to choose from on the internet! Fortunately, Joy of Baking did not disappoint me. I made a couple of alterations to the recipe (surprised? no...) Instead of raisins and pecans, I used crystallized ginger and snuck some kefir yogurt into the recipe in place of the buttermilk. I also upped some of the spices and decreased the vanilla. They were perfect, both with and without frosting.
PUMPKIN SCONES
2 c all purpose flour

1/3 c packed light or dark brown sugar
3/4 tsp ground ginger
1 tsp ground cinnamon
1/2 tsp all spice
1 tsp baking powder
1/2 tsp baking soda
1/2 c cold butter, cut into pieces
1/4 c finely chopped candied ginger
1/2 c buttermilk (or kefir yogurt - if using yogurt, stir in 2-3 Tbs of milk)
1/2 c canned pure pumpkin
1/2 tsp vanilla 

For frosting, see pumpkin whoopie pie post.

1.  Preheat oven to 400 degrees F.
2. Sift dry ingredients together in a large bowl (except for ginger).
3. Cut butter into flour mixture using pastry cutter, knives, or forks, until the mixture resembles crumbs.
4. Stir in the ginger.
5. Whisk the buttermilk, pumpkin and vanilla together in a small bowl.
6. Fold wet into dry ingredients in as few strokes as possible (but it should be well-mixed).
7. On a floured surface, knead dough gently 5-6 times. Pat into a circle about 12 inches in diameter and cut into 8 wedges. Place wedges on baking sheet and bake for ~20 minutes.

Saturday, September 24, 2011

Coffee-Spice Shortbread

Nothing is more gratifying than taking a dish to a potluck and having people rave about it. Or having people confess they don't like certain spices or flavors only to be told those spices/flavors are in the consumed good! It's nice to surprise people and broaden their culinary horizons. The interesting thing about this recipe is the fascinatingly delicious combination of coffee plus cardamom, ginger and cinnamon flavors. I love that ginger appears in 3 different parts of the dessert and that the shortbread itself, perhaps due to the coffee taste, does not have the overwhelmingly buttery taste of plain shortbread. The spice of the crystallized ginger is a nice balance to the sweetness of the white chocolate frosting. I made up my own frosting (and am guessing at the quantities used so I apologize if it's not quite accurate), but the base is from Bon Appetit's Dec 2010 issue.


Coffee-Spice Shortbread with Crystallized Ginger
2 c. all purpose flour
3/4 c. dark brown sugar, packed
2 Tbs plus 2 tsp ground coffee beans (decaf)
2 tsp ground ginger
1 1/2 tsp ground cinnamon
1 tsp ground cardamom
1/2 tsp salt
1 c. chilled unsalted butter (or if you use salted butter, use only half the amount of salt at most)

Frosting:
white chocolate chunks
whipping cream
canola oil
icing sugar
ground cardamom
ground ginger

Topping:
Diced candied ginger

1. Preheat oven to 325 degrees F. 
2. Mix all dry ingredients except butter in a food process for 5 seconds.
3. Add cubed butter to food processor and use on/off turns until moist clumps begin to form.
4. Gather dough into a ball and split in half. Press each half into a 9" tart pan with removeable bottom.
5. Bake shortbread 25 minutes. Rotate pans and bake another 20 minutes.
6. Cool shortbread in pans 5 minutes, then remove from pans and cut into 12 wedges each.
 7. To make frosting, place whipping cream (~1/8 of a cup?) and white chocolate chunks (~3/4 - 1 c.) in a saucepan (or double boiler) and warm gently, whisking to combine melted chocolate.
8. When all the chocolate is almost melted, beat in the canola oil (~3-4 Tbs) , icing sugar (~1/4 c. icing sugar), cardamom (1/2 tsp) and ginger (1/2 tsp). Let cool slightly to thicken, then spread on cooled shortbread.
9. Top with candied ginger.

Wednesday, September 21, 2011

Rugelach Time

Well once again I was forced to bake something (haha) that was horribly rich and fattening, just to use up some old goat cheese. Life is tough sometimes. So if you find yourself with very fragrant goat cheese, or cream cheese, I recommend incorporating it into a rugelach dough. The nice thing about the dough is you can make it and leave it in your fridge for 2-3 days before finishing off the process of filling and baking them. Traditional fillings include a poppy seed sugar mixture, raisins/walnuts/cinnamon/sugar, jams, etc. The flavors of fillings I used for my rugelach were amazing, but I still have to learn how to create a filling that doesn't ooze everywhere when baking. For my first batch, I used apricot jam and chopped walnuts (note it is very important to press any kind of nut filling into the dough with your rolling pin before attempting to roll the rugelach up!) These were wife's favorites. Only before she banned me from any more baking because she wasn't able to resist eating platefuls of rugelach and feeling slightly ill afterwards :) For my second batch, I attempted to follow a recipe for poppy seed filling but completely botched the instructions so just ended up making my own version. Heated up poppy seeds, water, honey, and a bit of sugar-- simmering until thickened and then stirred in some chopped semi-sweet chocolate and cocoa powder (to get the right sweetness levels) until melted. Worked for me!
 
  
Apricot-walnut filling pressed into dough, before rolling

Chocolate-poppy seed rugelach before baking

Baked apricot walnut rugelach!

Tuesday, September 20, 2011

Beer Bread!


One of the many perks to having a keg of beer at your party, in addition to actually drinking the beer, is using up the leftover beer to make beer bread. Loaves and loaves of beer bread. Beer bread with cheese,  cheese and herbs, cheese and garlic, walnuts, green onions and cheese, walnuts and raisins - so many options! I can't remember where I got this recipe (probably allrecipes.com) but I have used it without fail over and over again. Note, if you have leftover cider instead of beer, you can use it to make a sweet breakfast bread. Stir in some cinnamon, cloves, etc, and possibly add a layer of jam in the middle of the dough. It works wonderfully!

Beer Bread
3 c. all purpose flour
2 Tbs baking powder
3-4 Tbs sugar
1 tsp salt
1 can/bottle of beer (~341 ml)
Optional: 1 c. grated cheddar cheese, tsp of thyme/oregano/and basil, 1/2 tsp of garlic powder, etc. etc.

1. Sift dry ingredients together. If adding optional ingredients, stir  in next.
2. Pour beer into well in the centre of dry ingredients. Mix just until the dough comes together.
3. Place in a greased 9 x 4" loaf pan (butter, margarine, whatever) and bake for 50-60minutes at 350 degrees F.
4. Let cool in pan for 3-4 minutes before flipping out onto a rack to finish cooling (this prevents soggy bread bottoms!)


Cheese beer bread


Monday, September 12, 2011

Cheesecake pops

So this party that I was talking about - should I give the full run-down of foods made? Starting on the Saturday before hand, I baked two types of crackers, and then during the week proceeded to tackle all of the following: mango salsa, vegan cashew cheese, eggplant dip, kefir dipping sauce for a fruit platter, vegan meat balls with vegan BBQ sauce, artichoke cheese dip, flourless chocolate espresso cake, vegan mint chocolate cupcakes, and cheesecake pops. Of course I didn't manage to get a picture of either table full of food :(  Bad planning once again on my part. But I did get some super nice shots of the cheesecake pop process - probably because it went on for SOOO long.
Dipping the frozen cheesecake pops

The wow/cuteness factor (not to mention the tiny popsicle sticks!) definitely made the effort worth it. My only comment about the cheesecake produced by this recipe, is that it seemed a little dry - whether from over baking, or because it needs to be a bit more solid to cling to the popsicle stick well, I don't know. Also for the dipping chocolate, I did not find the amount of vegetable shortening added realistic at all. I added the shortening and then kept stirring in small quantities of canola oil until the chocolate was a dippable consistency. I used a chopstick to drizzle lines of chocolate of the opposite color over the dipped cheesecake pops.

The finished product - so arty!

Friday, September 09, 2011

Raisin-Sunflower Seed Crackers (RainCoast Crisp Attempt Two)

Second version of raincoast crisps! This one is a sweeter cracker with raisins (and optionally apricots), sunflower seeds, sesame seeds, and a hint of molasses giving the cracker a rich brown colour. The downside is these crackers have more of a tendency to taste burnt if overcooked (due to the burning raisins).
After first baking...


After second baking!
Raisin-Sunflower Seed Crackers
4 c. all purpose flour
1 Tbs baking soda
1 tsp salt
1 1/2 c. raisins
1 c. toasted sunflower seeds
1/2 c. toasted sesame seeds
1/4 c. brown sugar
1 3/4 c. buttermilk
1 Tbs molasses
1/4 c. unsalted butter, melted (cool slightly)
1 egg white (for brushing)

1. Mix the dry ingredients together.
2. Once the melted butter has cooled slightly, beat in the buttermilk and molasses.
3. Stir the wet ingredients into the dry ingredients just until moistened.
4. Scoop onto a lightly floured surface and knead gently until dough comes together.
5. Shape into four loaves about 3" wide by 10-12" long.
6. Brush tops with egg white and place loaves on parchment paper- lined baking sheet.
7. Bake at 375 degrees F.  for 35 minutes until golden brown and sounding hollow when tapped.
8. Let cool completely, then slice into 1/4" thick slices.
9. Lay flat on parchment paper and bake at 350 degrees F for 15-18 minutes until golden and crisp.

Once cooled, store in an air tight container or freeze until you want to use them.

Wednesday, June 15, 2011

Quick Bran Bread

Being that I was short on both time and bread this week, I opted try a new quick bran bread recipe instead of my usual no-knead bread. Unfortunately, once I started the recipe I realized I didn't have nearly the quantity of bran flakes called for, but I did have rice bran and buckwheat flour on hand. So I did what any irresponsible and impulsive baker would do - substitute with abandon! Amazingly my crazy substitutions worked like a charm in this recipe.The bread emerged with a dense, moist interior and a delicately crunchy exterior. Totally delectable with butter and jam, butter and honey, and any kind of fresh cheese.

Whole-Wheat Bran Bread
2 c. whole wheat flour
2 c. wheat bran flakes (my combo was ~1 1/4 c. rice bran + ~1/4 c. wheat bran flakes + ~1/2 c. buckwheat flour --- my  basic thought was that if I was using something denser than flakes, the total volume should be a bit less than 2 c. so that the bread wouldn't turn out too dry)
3 tsp baking powder
1 tsp salt
1 1/3 c. milk
1 egg, room temperature 
2 Tbs molasses
2 Tbs melted butter
1 c. nuts (I substituted 1/4 c. sesame seeds and 1/4 c. ground flax)

Stir dry ingredients together. Beat wet ingredients together. Mix wet with dry just until moistened. Place batter in a greased 9x5" loaf pan and let sit for 15 minutes. Then bake at 375 degrees F for 50-60 min. Let cool 5-10 minutes and remove from pan onto cooling rack.

Photo to come if I can manage to stop eating the bread long enough to take one...

Thursday, June 09, 2011

S'mores bars

After a long day and an equally long week of late nights, I was looking for the quick & easy dessert fix. Perhaps too quick & easy....I decided to give the baked s'mores dessert concept another try after my somewhat disappointing s'mores brownies experience. This one was theoretically a crunchy graham cracker crust base, topped with melted chocolate and marshmallows and sprinkled with some excess graham cracker base. Utterly disappointing (very likely due to my substitutions) and not really worth writing about except as proof that I have been in the kitchen!

S'mores bars
1/2 cup butter, melted
2 Tbs white sugar
1 1/2 cups graham cracker crumbs (I crushed graham crackers)
1 cups semisweet chocolate chips (I used chopped unsweetened with a bit of butter and not enough sugar. I do NOT recommend this substitution)
1 1/2 cups miniature marshmallows(or large marshmallows chopped bite-size)
    Line an 8x8" pan with foil. Press 2/3 of the graham cracker crumb mixture into the pan and bake for 10 min at 350 degrees F. Top with chocolate and marshmallows and remaining graham cracker crumbs. Press to flatten with a spatula. Bake 10 more minutes. LET COOL. Pull foil/s'mores bars out of pan and slice into squares.
    *Note if you are using bars of chocolate chopped, I pre-melted mine in the microwave. In retrospect as long as you chop up to a reasonable consistent size (e.g. chocolate chip size), it should work fine to just sprinkle on the chocolate as is.

    Commentary: Even if you line the pan with foil, the marshmallows still stick to the foil. It was however easy to lift the bars out of the pan and not having to wash the pan was even better! The crust was a fiasco. Super crumbly even though there seemed to be plenty of butter. I used salted butter in the crust and while it's possible I didn't put the full 2 Tbs of sugar in with the crust, it also seemed very salty. Then again it could have been that my chocolate layer didn't have enough sugar to counter balance.  I would definitely use unsalted butter next time. I also think maybe there is something key to the size of the marshmallows and that bite size may turn out better. Marshmallows melted this way are not my favorite texture, either hot or cold. All I can say is, maybe there is a marshmallow club that you belong to if you have success making these kinds of recipes http://allrecipes.com/Recipe/smores-crumb-bars/Detail.aspx and I clearly don't have what it takes. Never gonna be a member. Sigh.

    From henceforth, I vow never to use my cooking powers for evil. I shall only use marshmallows either in (a) rice krispies or (b) actual campfire s'mores.

    Addendum: Apparently wife and friend thought the bars tasted fine. Go figure. Cooling is essential to liking them more. I think as long as you use UNSALTED butter in the crumbs, and sufficient milk choc chips and marshmallows, it could be an enjoyable dessert.